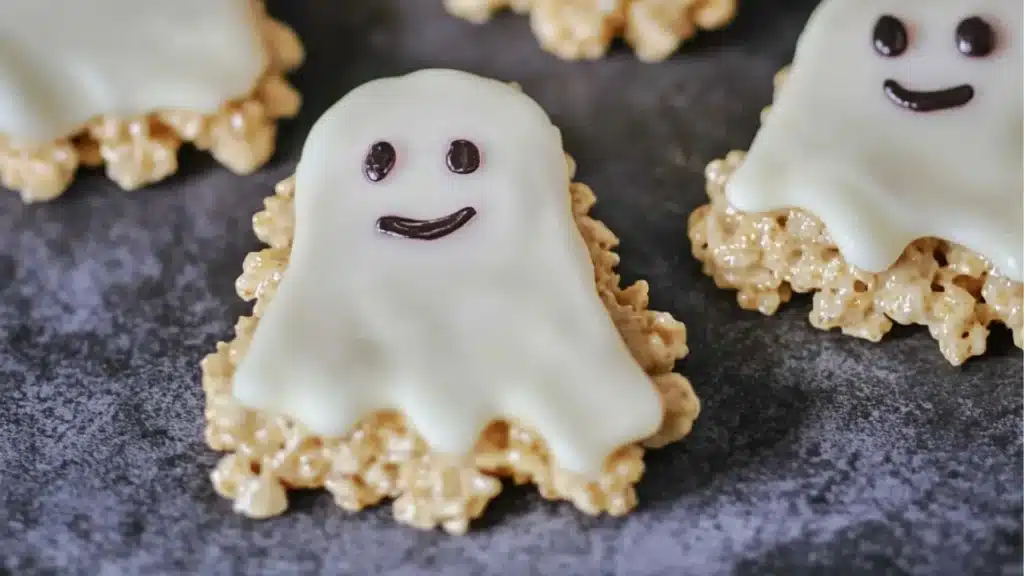
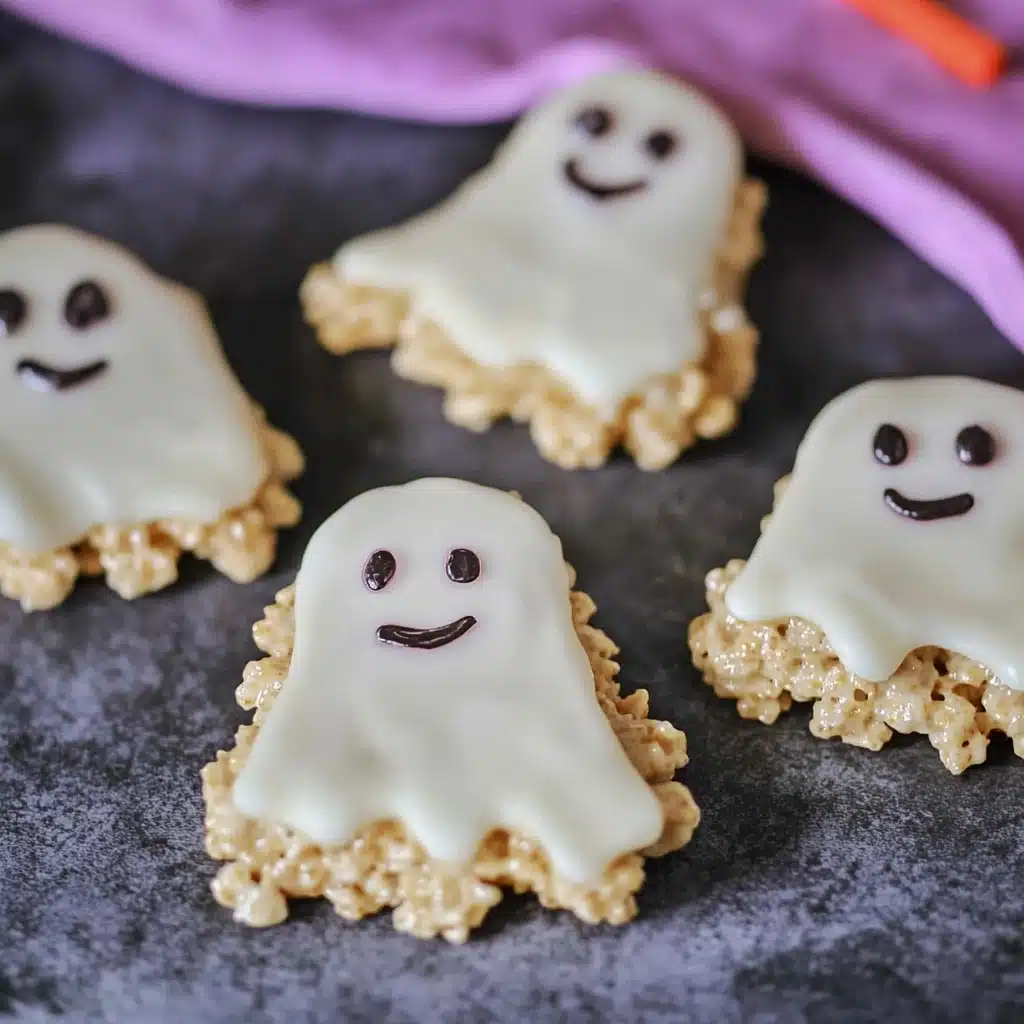
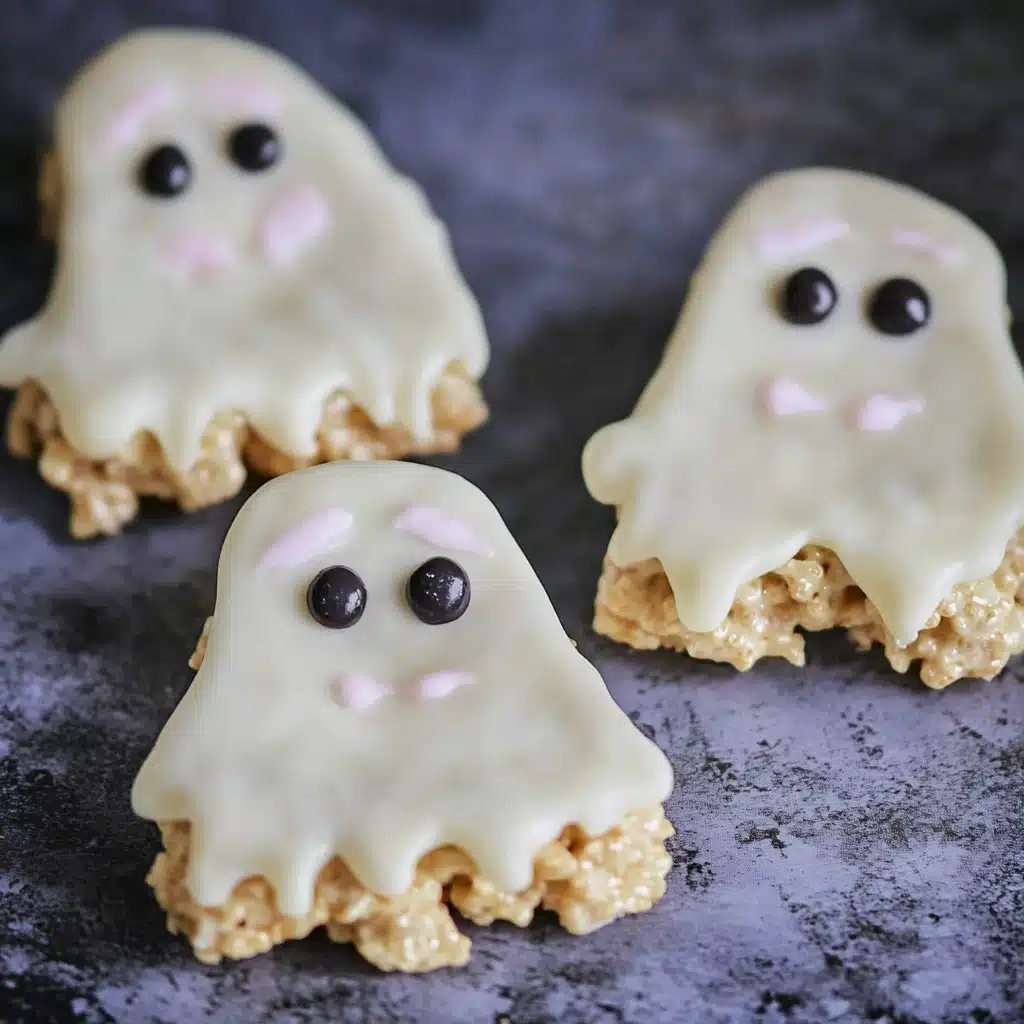
Looking for the ultimate Halloween party snack that’s both adorable and spooky? These Rice Krispie Treat Ghosts are a fun, easy-to-make treat that kids and adults alike will love. Made from gooey marshmallow and crispy rice cereal, then shaped into cute little ghosts with sweet candy eyes, these Halloween-themed goodies are the perfect blend of cute and creepy.
Whether you’re planning a classroom celebration, a Halloween shower, or a family movie night, these cute Halloween rice krispy treats are a sure hit. They’re simple enough for kids to help make and delicious enough to keep everyone coming back for more. And best of all, they’re no-bake, making them ideal for busy parents or last-minute party prep.
These ghosts aren’t just a fun treat—they’re also a spooky addition to your table of Halloween desserts for kids party and fit perfectly alongside themed goodies like vampire fudge and mini Halloween pizzas.
Let’s dive into how to make these frightfully fun treats!
Table of Contents
Why These Rice Krispie Treat Ghosts Are a Must for Halloween
Halloween is all about creativity, fun, and just the right amount of spooky. These rice krispie treat Halloween ideas check all those boxes:
They’re incredibly easy to make using just a few pantry staples. They require no baking—perfect for busy households or classrooms. You can decorate them however you like, from goofy ghosts to slightly scary ones. They’re a great Halloween treat alternative if you want to skip the usual candy overload. Kids can help shape and decorate them—perfect for family bonding time. Their soft texture and sweet vanilla flavor make them universally loved, even by picky eaters.
Add them to a dessert table alongside ghost fruit skewers or Halloween dirt cups for a memorable party spread.
Ingredients Needed for Rice Krispie Treat Ghosts
These simple ingredients come together quickly to form the base of your spooky treats. For the best results, follow the measurements closely:
For the base:
- 4 tablespoons unsalted vegan butter or regular butter
- 10 ounces (283g) mini marshmallows
- 6 cups crisped rice cereal (like Rice Krispies)
- 1/2 teaspoon pure vanilla extract
For decoration:
- White candy melts or white chocolate (about 12 ounces)
- Candy eyes (available at craft or baking stores)
- Optional: melted dark chocolate or black icing for spooky ghost faces
Looking for a gluten-free version? Use gluten-free puffed rice cereal and double-check all packaged ingredients. For other themed treats, check out chocolate chip gluten-free pumpkin cookies too.
Tools and Equipment to Make Cute Halloween Rice Krispy Treats
Here’s what you’ll need to make and decorate your ghost treats:
- Large saucepan or Dutch oven
- Silicone spatula
- Mixing bowl
- 9×13-inch pan or parchment-lined baking sheet
- Ghost-shaped cookie cutter (or shape by hand)
- Microwave-safe bowl (for melting candy)
- Piping bag or small spoon (for applying melted chocolate or decorating)
- Toothpicks (optional for adding fine details)
No cookie cutter? No worries. You can hand-mold ghost shapes or even use a butter knife to cut oval or teardrop forms.
How to Make Rice Krispie Treat Ghosts Step-by-Step
Step 1: Make the Base Mixture
Melt the butter in a large pot over low heat. Once melted, stir in the mini marshmallows. Keep stirring until they’re fully melted and smooth. Remove from heat and stir in the vanilla extract.
Step 2: Add the Cereal
Quickly fold in the crisped rice cereal using a spatula, mixing until everything is evenly coated. Work fast while the mixture is still warm.
Step 3: Press and Cool
Transfer the mixture to a greased or parchment-lined baking pan. Press it down gently and evenly using a piece of parchment or oiled hands. Let cool for at least 30 minutes to firm up.
Step 4: Cut Out the Ghosts
Once set, use a cookie cutter to cut out ghost shapes. If shaping by hand, form soft teardrop mounds with a little swirl at the top.
Step 5: Melt the White Coating
In a microwave-safe bowl, melt the white chocolate or candy melts in 30-second intervals until smooth. Stir between each interval to prevent burning.
Step 6: Dip or Drizzle
Dip the tops of each ghost treat in the melted coating or drizzle over them for a fun textured look. Immediately press on the candy eyes before the coating sets.
Step 7: Decorate Faces (Optional)
Add spooky or silly expressions using melted chocolate, icing, or food pens.
Looking for other Halloween party snack ideas for kids? These pair beautifully with Halloween eyeball pasta salad and Jack-O’-Lantern hand pies.
Tips to Perfect Your Spooky Rice Crispy Treats Every Time
Use fresh marshmallows for the best gooey texture. Let the mixture cool slightly before cutting for cleaner shapes. If your kitchen is warm, chill the treats in the fridge for 15 minutes before dipping. Want a firmer treat? Press the cereal mixture down more firmly and chill before cutting. Use a silicone mat to avoid sticking and get even shapes.
Fun Variations and Add-Ins for Halloween Rice Krispie Treats
Add mini chocolate chips or candy corn to the mix before pressing it into the pan. Tint your melted chocolate with a bit of food coloring for pastel or spooky ghost colors. Add pumpkin spice for an autumnal twist, or try a chocolate base using cocoa cereal. Want healthier Halloween treat alternatives? Add flax or chia seeds to the mix or skip the white coating entirely and use dark chocolate.
Also try serving alongside pumpkin oatmeal chocolate chip cookies for variety on your dessert tray.
Serving Ideas: Halloween Party Snack Ideas for Kids
Place your ghost treats on a tray with a black tablecloth and scattered candy eyeballs. Add spooky signage like “Ghost Crossing” or “Caution: Haunted Bites!” Use mini cake stands or Halloween-themed cupcake liners for individual servings. Create a party platter with ghost treats, bloody cinnamon rolls, and marshmallow brains.
Storage Instructions: Keeping Your Halloween Crispy Treats Fresh
Store in an airtight container at room temperature for up to 4 days. Avoid stacking them directly—use parchment between layers to prevent sticking. If you’re making them ahead of time for a Halloween shower or party, wait to decorate them until the day of for the best appearance. Avoid refrigeration as it can harden the treats.
For other make-ahead options, check out our no-bake chocolate eclair cake or no-bake pumpkin pie balls.
Common Mistakes to Avoid When Making Ghost Treats
Overcooking the marshmallows can result in hard treats. Pressing the mixture too firmly can make them dense and chewy instead of light and airy. Using wet or hot tools to cut shapes can cause the treats to stick or fall apart. Not working quickly enough—marshmallow sets fast, so move swiftly after mixing. Skipping the parchment paper can cause a sticky mess when unmolding.
Creative Presentation Ideas for Halloween Showers and Parties
Use a haunted house-themed serving board for dramatic effect. Wrap individual ghost treats in cellophane with spooky labels for party favors. Add glow-in-the-dark plastic eyes or serve alongside Halloween party punch. Arrange ghosts in a graveyard setting with crushed cookie crumbs and candy bones. Pair with cheddar biscuit breakfast casserole for a spooky breakfast spread!
Healthy Halloween Treat Alternatives to Try
If you’re looking for something less sugary to balance out your party table, consider adding:
- Ghostly yogurt parfaits with layers of fruit
- Pumpkin whipped cottage cheese as a protein-packed dip
- Cucumber-dill salad shaped into creepy crawlies
- Frozen Greek yogurt peanut butter bites for a chilly sweet treat
FAQs About Rice Krispie Treat Ghosts and Halloween Desserts
Can I make these treats ahead of time?
Yes, but decorate them the same day for best appearance.
Can I make these nut-free for allergy-safe classrooms?
Absolutely. Just ensure your marshmallows and cereal are nut-free certified.
Can I make them vegan?
Use vegan marshmallows and dairy-free white chocolate. Brands like Dandies work well.
Do I need to use candy eyes?
Not at all! You can use chocolate chips, icing dots, or fondant circles as eyes.
Can I freeze them?
Freezing is not recommended—they’ll lose their chewy texture.
Other Halloween Treats You’ll Love
Love festive, creative desserts? Try these other must-make Halloween recipes from our site:
- Spooky Mummy Brownies
- Pumpkin Brownies
- White Chocolate Halloween Oreo Bark
- Pumpkin Cheesecake Cookies
- Halloween Vampire Bite Cupcakes
These recipes bring the wow factor to your dessert table while staying on theme!
Final Thoughts: Sweet, Spooky Fun in Every Bite
These Rice Krispie Treat Ghosts combine spooky fun with classic marshmallow goodness. They’re easy to make, endlessly customizable, and perfect for kids’ parties, Halloween showers, or a festive afternoon snack. With their soft texture, playful look, and nostalgic taste, they’re sure to become a yearly tradition in your Halloween kitchen.
For even more spooky-season inspiration, browse our full collection of Halloween dessert ideas and check out delicious additions like pumpkin poke cake or chocolate peanut butter granola bars.
Print
Irresistibly Soft Vegan Baked Pumpkin Donuts – The Cozy Fall Treat You Need
- Total Time: 25 minutes
- Yield: 8 donuts 1x
- Diet: Vegan
Description
These Vegan Baked Pumpkin Donuts are fluffy, moist, and warmly spiced — perfect for fall mornings, brunches, or festive gatherings. Made with pumpkin puree, cozy spices, and a cinnamon sugar coating, they’re dairy-free, egg-free, and baked instead of fried for a lighter treat.
Ingredients
Dry Ingredients
- 1 cup (120g) all-purpose flour
- 1 ½ tsp pumpkin pie spice
- ¼ tsp baking soda
- ¼ tsp baking powder
- ¼ tsp salt
Wet Ingredients
- ⅓ cup (70g) brown sugar or coconut sugar
- ⅓ cup (80ml) pumpkin puree
- ¼ cup (60ml) non-dairy milk
- 2 tbsp (30ml) neutral oil
- 1 tsp vanilla extract
- 1 tsp apple cider vinegar
Cinnamon Sugar Coating
- 2 tbsp melted vegan butter
- ¼ cup (50g) granulated sugar
- 1 tsp ground cinnamon
Instructions
- Preheat oven: Heat to 350°F (175°C) and lightly grease a donut pan.
- Mix wet ingredients: Whisk pumpkin puree, sugar, oil, non-dairy milk, vanilla, and vinegar until smooth.
- Combine dry ingredients: In another bowl, whisk flour, baking soda, baking powder, pumpkin spice, and salt.
- Make batter: Gently fold dry mixture into wet until just combined — do not overmix.
- Fill pan: Pipe or spoon batter into molds, filling ¾ full.
- Bake: Bake 14–16 minutes, until a toothpick comes out clean. Cool 5 minutes, then transfer to wire rack.
- Coat: Brush warm donuts with melted butter and dip in cinnamon sugar.
Notes
- Do not substitute pumpkin pie filling for pumpkin puree.
- Apple cider vinegar helps activate baking soda for a fluffy texture.
- Overmixing will make the donuts dense.
- For gluten-free, use a 1:1 GF flour blend.
- Prep Time: 10 minutes
- Cook Time: 15 minutes
- Category: Breakfast, Dessert
- Method: Baking
- Cuisine: Vegan, Fall-Inspired
Nutrition
- Serving Size: 1 donut
- Calories: 170
- Sugar: 13g
- Sodium: 150mg
- Fat: 6g
- Saturated Fat: 1g
- Unsaturated Fat: 4g
- Trans Fat: 0g
- Carbohydrates: 27g
- Fiber: 1g
- Protein: 2g
- Cholesterol: 0mg
Keywords: vegan pumpkin donuts, baked pumpkin donuts, fall baking, dairy free donuts, egg free donuts