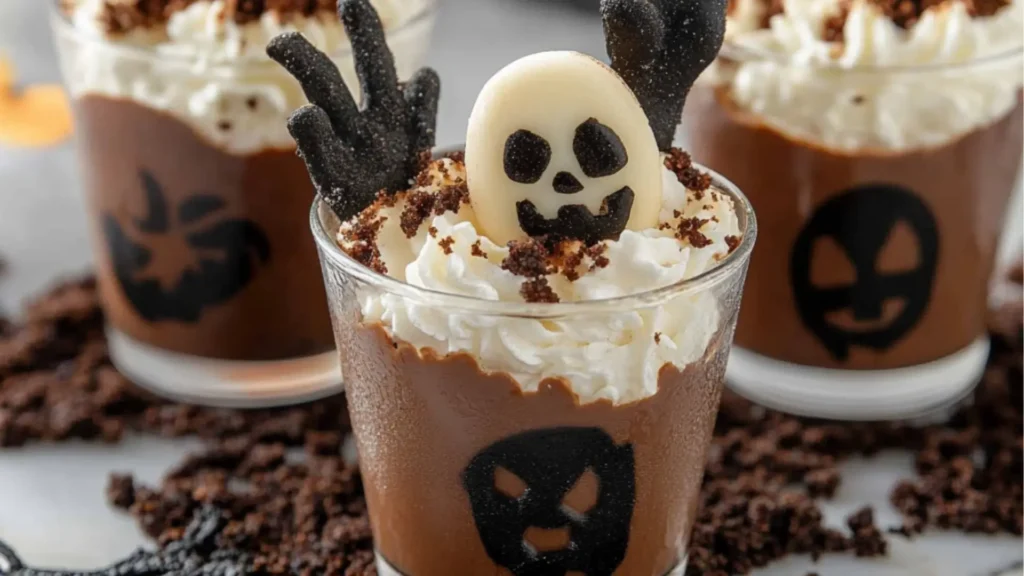
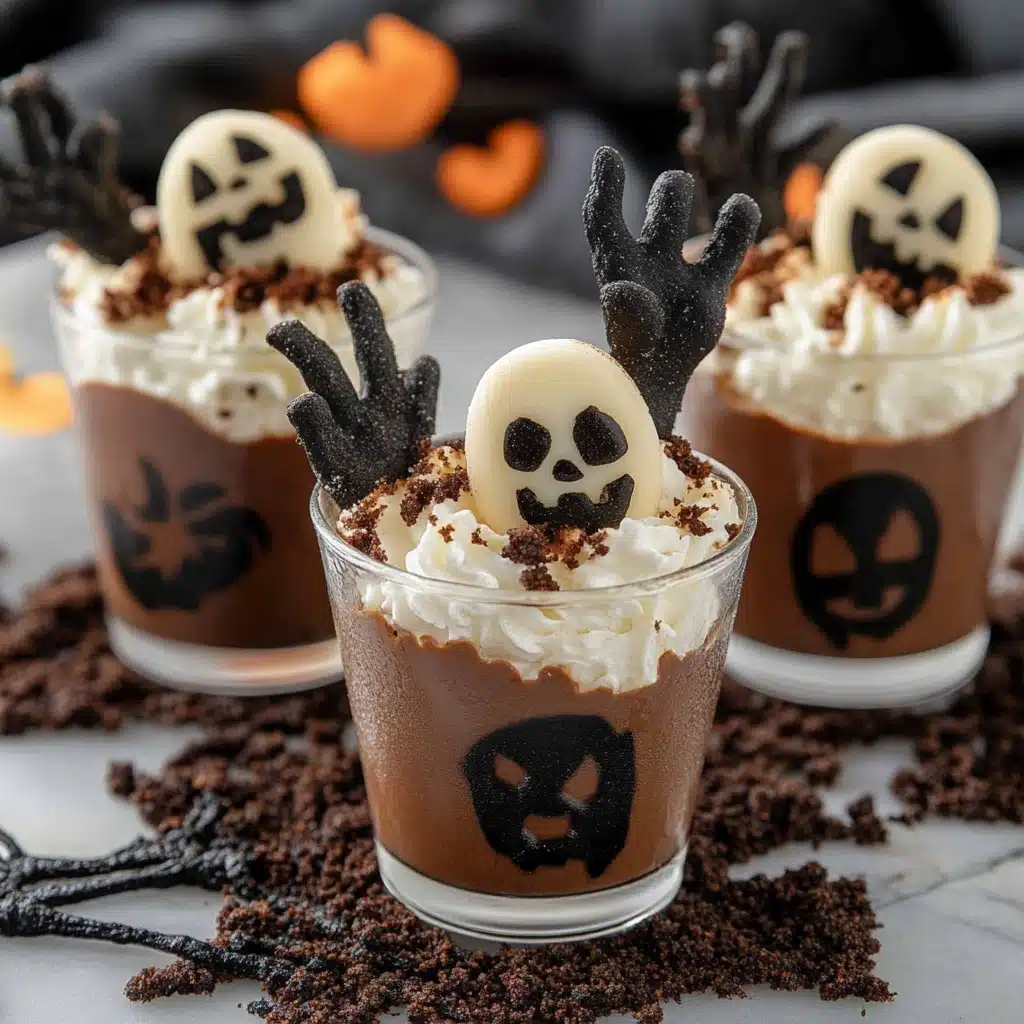
Halloween is the perfect time to get creative in the kitchen, especially when it comes to sweet treats! These Halloween Dirt Cups are not only adorably spooky but also easy enough for kids to help make. Layered with chocolate pudding, crushed cookies, and fun toppings like gummy worms, candy eyes, and ghost-shaped marshmallows, this dessert brings smiles to all ages.
Whether you’re hosting a Halloween party, school event, or just want to make a fun family dessert, these spooky dirt cups are sure to be a huge hit. With only a few ingredients and endless ways to decorate, this is the ultimate fun Halloween dessert that everyone will enjoy.
If you’re also curious about savory options, check out our Spooky 7-Layer Halloween Taco Dip for a party-friendly appetizer to go alongside these dirt pudding cups!
Table of Contents
Why Halloween Dirt Cups Are a Must-Try Dessert Halloween Treat
There’s something nostalgic about dirt pudding—maybe it’s the layers of creamy pudding and crunchy cookies, or maybe it’s the gummy worms that peek out from the “soil.” For Halloween, we’ve made it extra festive with toppings like ghost marshmallows, candy pumpkins, and monster sprinkles.
Here’s why you’ll love them:
- No baking required
- Ready in under 30 minutes
- Customizable for allergies or preferences
- Perfect for parties and kid-friendly
- Can be made ahead of time
If you love themed sweets like White Chocolate Halloween Oreo Bark or Mummy Brownies, then you’ll absolutely adore these cups.
Ingredients for Halloween Dirt Cups Recipe
This recipe makes 6 cups. Feel free to double or halve based on your crowd size.
- 1 package (3.9 oz) instant chocolate pudding mix
- 2 cups cold milk
- 1 (8 oz) tub whipped topping, thawed
- 10–12 chocolate sandwich cookies (like Oreos), crushed
- 6 gummy worms
- Candy eyes or ghost marshmallows
- Halloween sprinkles, candy pumpkins, or themed toppers
- 6 small clear cups or jars
Optional Add-ins:
- Crushed graham crackers (for dirt variety)
- Candy corn
- Whipped cream
- Homemade Applesauce mixed into pudding for natural sweetness
These ingredients are easy to find and can be customized for dietary needs (e.g., dairy-free pudding, gluten-free cookies).
Step-by-Step: How to Make Halloween Dirt Pudding Cups
- Make the pudding: In a mixing bowl, whisk the pudding mix with cold milk until thickened (about 2 minutes). Let it sit for 5 minutes to set.
- Fold in whipped topping: Gently mix the whipped topping into the pudding to create a light, mousse-like texture.
- Crush cookies: Use a food processor or zip-top bag with a rolling pin to crush cookies into fine crumbs. Set aside.
- Layer your cups: In each cup, spoon a layer of pudding, then add a layer of cookie crumbs. Repeat once more.
- Decorate: Add gummy worms sticking out, candy eyes peeking from the “dirt,” ghost marshmallows on top, or even draw faces on marshmallows for a spooky look.
- Chill before serving: Refrigerate for at least 30 minutes for best flavor and structure.
Looking for a similar layered treat? You’ll also love our Pumpkin Oatmeal Cream Pies for a seasonal fall dessert that’s rich and comforting.
Kitchen Tools You’ll Need to Make Dirt Cake Cups Halloween Style
Keep it simple. You’ll only need:
- Medium mixing bowl
- Whisk
- Measuring cups
- Food processor or zip-top bag + rolling pin
- Spoon or spatula
- Clear plastic cups or mini mason jars
No oven, no mixer—just easy, spooky fun!
Make It Spooky: Ghost-Themed Halloween Dessert Ideas
What makes these ghost-themed Halloween desserts extra special is how you decorate them. Here are some ideas to give your dirt cups a spooktacular twist:
- Use ghost Peeps or marshmallows with faces drawn using edible markers.
- Add candy eyes to make it look like something is hiding in the dirt.
- Pipe whipped cream ghosts using a piping bag with a round tip.
- Stick in a mini tombstone cookie made from graham crackers.
Pair with Ghost Fruit Skewers for a healthy, adorable Halloween-themed party plate.
Dirt Cups Recipe Variations & Creative Add-ins
Want to change it up? Here are some fun twists:
🎃 Halloween S’mores Dirt Cups
- Use chocolate pudding
- Layer in crushed graham crackers
- Add mini marshmallows or roast Peeps on top
- Drizzle melted chocolate for extra s’mores flavor
🍬 Candy Explosion Cups
- Add chopped candy bars like Twix or Reese’s
- Top with Halloween M&Ms or candy corn
🧛 Monster Face Cups
- Use colored candy melts to “draw” spooky faces on the cup’s inside before filling
- Use gummy fangs or black licorice for effect
These are just a few ways to turn a basic dirt cups recipe into something unforgettable.
Common Mistakes to Avoid When Making Halloween Dirt Cups
While these are simple, a few things can go wrong if you’re not careful:
- Soggy cookies: Don’t layer too early if not serving soon; keep layers separate and assemble close to serving time.
- Runny pudding: Be sure to use instant pudding and cold milk; don’t over-mix.
- Overloaded cups: Less is more when it comes to decorations—keep the theme but avoid mess.
- Wrong containers: Use clear cups to show off the layers!
Want to practice your no-bake skills? Our No-Bake Cheerio and Peanut Butter Bars are another great beginner-friendly dessert.
Serving & Presentation Tips for Spooky Dirt Cups
Serve your spooky dirt cups with flair using these fun ideas:
- Display on a Halloween-themed tray or cupcake stand
- Label each cup with cute names like “Zombie Food” or “Worm Farm”
- Use themed spoons or straws (striped orange, black, or green)
- Add mini plastic spiders or bats for decoration (non-edible!)
Pair them with Frozen Banana Snickers for a cool contrast or Pumpkin Fluff Dip for a creamy dip station.
Storing Halloween Dirt Cups: Make-Ahead & Leftovers
These treats store well with the right handling:
- Refrigerate covered for up to 3 days
- Do not freeze—the texture will change and cookies get mushy
- For best texture, store pudding and cookies separately, and assemble before serving
- Keep decorations like gummy worms or marshmallows out until serving
They’re a great make-ahead option for a party, especially if you have other dishes like Pumpkin Roll-Ups on your menu.
Fun Halloween Desserts to Try Next
Once you’ve mastered these Halloween Dirt Cups, don’t stop there! Here are some other spooky desserts that your guests will love:
- Spooky Mummy Brownies
- Pumpkin Magic Custard Cake
- Bloody Red Velvet Popcorn
- Apple Cider Whoopie Pies
- Halloween Oreo Bark
Your Halloween party table will never be boring again!
FAQs: All About Halloween Dirt Cups Recipe
Can I make these ahead of time?
Yes, but assemble the cups shortly before serving to keep cookies crunchy.
Can kids make these?
Absolutely! This is a great no-bake recipe for kids with adult supervision for prep.
Can I make them dairy-free?
Yes, use dairy-free pudding and whipped topping alternatives.
What’s the best way to crush the cookies?
Place them in a zip-top bag and use a rolling pin or your hands to crush finely.
Can I use other pudding flavors?
Of course! Vanilla, butterscotch, or even pumpkin pudding can make fun alternatives.
Loved These Spooky Dirt Cups? Share & Subscribe for More Dessert Halloween Ideas!
These Halloween Dirt Cups are creepy, creative, and a guaranteed hit at your next spooky celebration. They’re easy to make, full of flavor, and totally Instagram-worthy.
Try them with the kids, serve them at a party, or gift them to friends and neighbors this Halloween! If you loved this recipe, be sure to check out more of our Fun Halloween Desserts and subscribe to our blog for weekly recipe inspiration and seasonal ideas.
Don’t forget to share this recipe with your fellow Halloween lovers—it’s a treat that’s too good to keep secret!
Print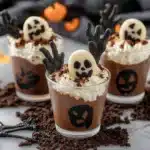
Irresistible Halloween Dirt Cups Recipe: A Spooky & Fun Dessert Treat
- Total Time: 15 minutes
- Yield: 6 cups 1x
Description
These Halloween Dirt Cups are a fun and spooky no-bake dessert layered with chocolate pudding, crushed cookies, and festive toppings like marshmallow ghosts and candy bones. Perfect for parties, kids, or Halloween treats made ahead!
Ingredients
- 1 (3.9 oz) package chocolate instant pudding mix
- 2 cups cold milk
- 8 oz whipped topping (like Cool Whip), thawed
- 15 chocolate sandwich cookies (like Oreos), crushed finely
- Halloween-themed candies: candy pumpkins, gummy worms, candy eyeballs, or Peeps ghosts
- Optional: 4 oz cream cheese for extra creaminess
- Clear plastic cups or jars for serving
Instructions
- In a mixing bowl, whisk pudding mix and cold milk. Let set for 5 minutes.
- Gently fold in whipped topping. For a richer texture, beat in softened cream cheese first.
- Crush cookies in a food processor or with a rolling pin in a zip-top bag.
- Layer pudding mixture and crushed cookies into cups, ending with cookie crumbs on top.
- Decorate with Halloween-themed candies like ghosts, eyeballs, or bones.
- Chill in the fridge for at least 1 hour before serving.
Notes
- Use clear cups so layers are visible for full spooky effect.
- Don’t skip chilling—pudding needs time to firm up.
- Let kids decorate their own cups for party fun.
- Add a s’mores twist with a graham cracker layer and mini marshmallows.
- Make ahead up to 24 hours in advance; add toppings right before serving.
- Prep Time: 15 minutes
- Cook Time: 0 minutes
- Category: Dessert
- Method: No Bake
- Cuisine: American
Nutrition
- Serving Size: 1 cup
- Calories: 290
- Sugar: 20g
- Sodium: 280mg
- Fat: 14g
- Saturated Fat: 9g
- Unsaturated Fat: 4g
- Trans Fat: 0g
- Carbohydrates: 34g
- Fiber: 1g
- Protein: 3g
- Cholesterol: 10mg
Keywords: Halloween Dirt Cups, Dirt Cake Cups Halloween, Spooky Dirt Cups, Ghost-themed Halloween Dessert, Halloween Pudding Cups