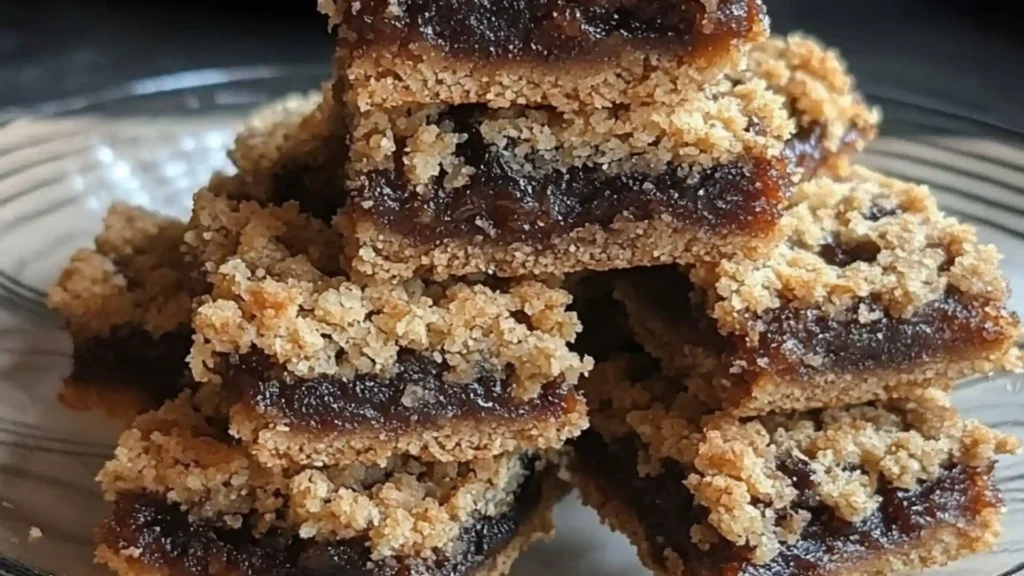
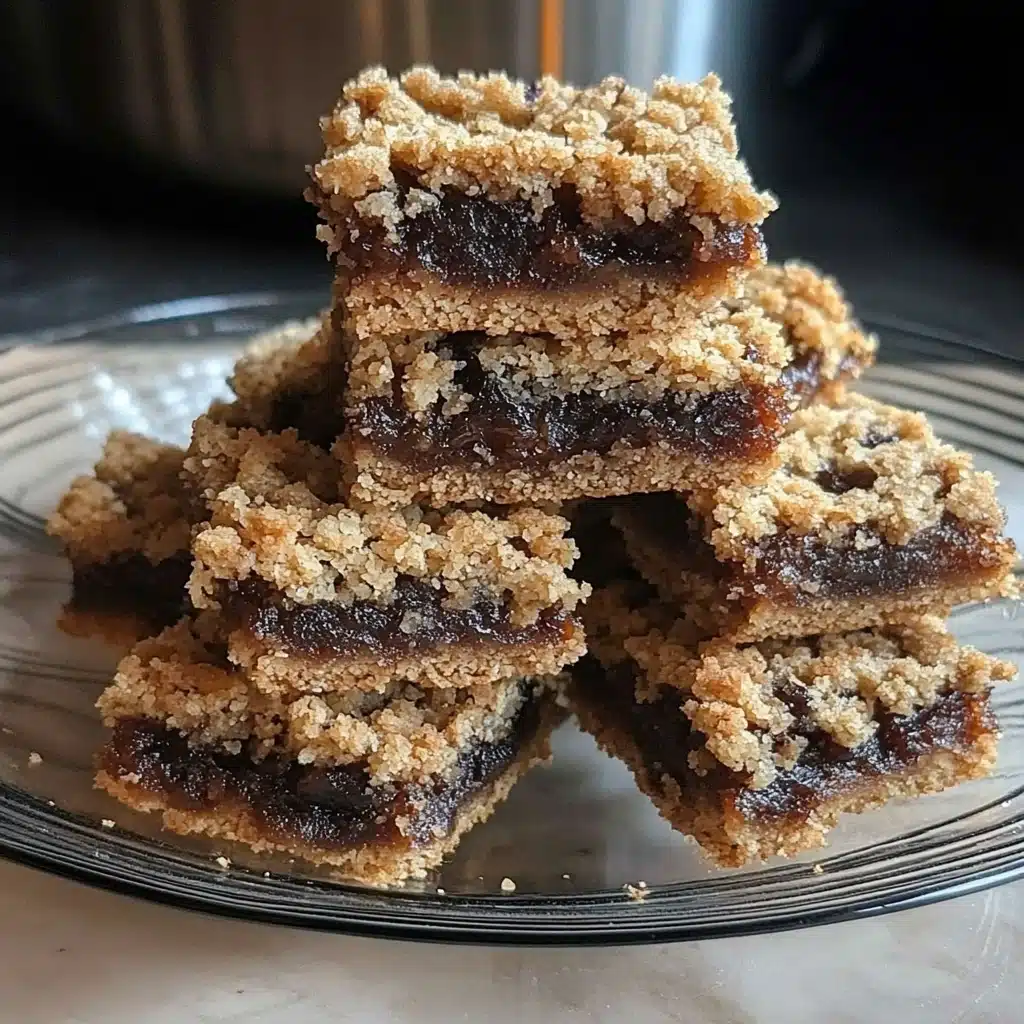
Few desserts capture the warmth of home quite like Old-Fashioned Date Squares. With their buttery oat crumble and sweet, jammy date filling, these bars taste like something straight from Grandma’s kitchen. Soft in the middle and crisp on top, they’re the perfect balance of cozy and wholesome — the kind of treat that fills your home with the comforting scent of baking oats and caramelized fruit.
Whether you call them date squares, date bars, or date-filled cookies, this timeless recipe has been a favorite for generations. It’s simple to make, incredibly satisfying, and ideal for breakfast, dessert, or a sweet afternoon snack with a cup of tea.
If you’ve never made them before, get ready to fall in love with this nostalgic treat. Let’s bring back a classic that’s as heartwarming as it is delicious.
Table of Contents
What Are Old-Fashioned Date Squares?
Date squares are layered bar cookies featuring a buttery oat crumble on the top and bottom, sandwiching a thick, naturally sweet date filling. The oats provide a crumbly texture similar to shortbread, while the filling adds a caramel-like richness that makes each bite irresistible.
These treats have long been a staple in homes across North America and Europe, especially during the holidays or family gatherings. Some know them as date bars or matrimonial cake — a name inspired by how well the crust and filling “marry” together.
They’re simple, satisfying, and endlessly versatile, proving that sometimes the best recipes don’t need fancy ingredients — just a little love and butter.
The History and Charm of Classic Date Squares
The origins of Old-Fashioned Date Squares date back to the early 1900s, when dates were first imported in large quantities and quickly became a pantry favorite for home bakers. These bars became especially popular during the Great Depression for their affordability, long shelf life, and natural sweetness.
In Canada, they became a beloved dessert in school cafeterias, family reunions, and church bake sales. In Europe, similar date cookies recipes were served with tea or coffee as a mid-afternoon indulgence.
There’s something timeless about this recipe — every bite feels nostalgic, comforting, and just a little bit sentimental.
Why You’ll Love This Date Squares Recipe
There are dozens of reasons to adore these homemade date squares:
- Simple ingredients you probably already have in your pantry.
- Naturally sweet filling made entirely from dates — no refined jam required.
- Perfectly textured layers of crumbly oats and buttery crispness.
- Easy to customize with nuts, coconut, or spices.
- Freezer-friendly for make-ahead desserts or snacks.
They’re also ideal for small-batch baking — just halve the recipe to make a smaller pan if you’re baking for two.
Ingredient Overview and Key Tips
Each ingredient in this recipe has a purpose, creating the perfect balance of sweetness, texture, and comfort:
- Rolled oats: Give the crust and topping a hearty, chewy texture. Avoid instant oats for the best structure.
- Flour: Helps hold the crumble together. Whole wheat flour can be used for a rustic twist.
- Brown sugar: Adds caramel flavor and helps the crust crisp as it bakes.
- Butter: The heart of the recipe. It binds the oats and flour while adding richness and golden color.
- Dates: Naturally sweet, soft, and sticky, they’re cooked into a luscious paste-like filling.
- Vanilla extract: Brings warmth and depth.
- Baking soda: Balances acidity and softens the filling.
- Salt: Enhances the overall flavor profile.
Tip: Use Medjool or Deglet Noor dates — both are sweet and soft, ideal for creating that signature creamy filling.
Full Ingredient List with Measurements
For the Oat Crust and Topping
- 1 ¾ cups (220 g) all-purpose flour
- 1 ½ cups (150 g) rolled oats
- ¾ cup (150 g) brown sugar, packed
- 1 teaspoon baking soda
- ½ teaspoon salt
- 1 cup (225 g) unsalted butter, melted
For the Date Filling
- 2 cups (300 g) pitted dates, chopped
- 1 cup (240 ml) water
- 1 teaspoon vanilla extract
- ½ teaspoon baking soda
- Optional: 1 tablespoon lemon juice or orange zest for brightness
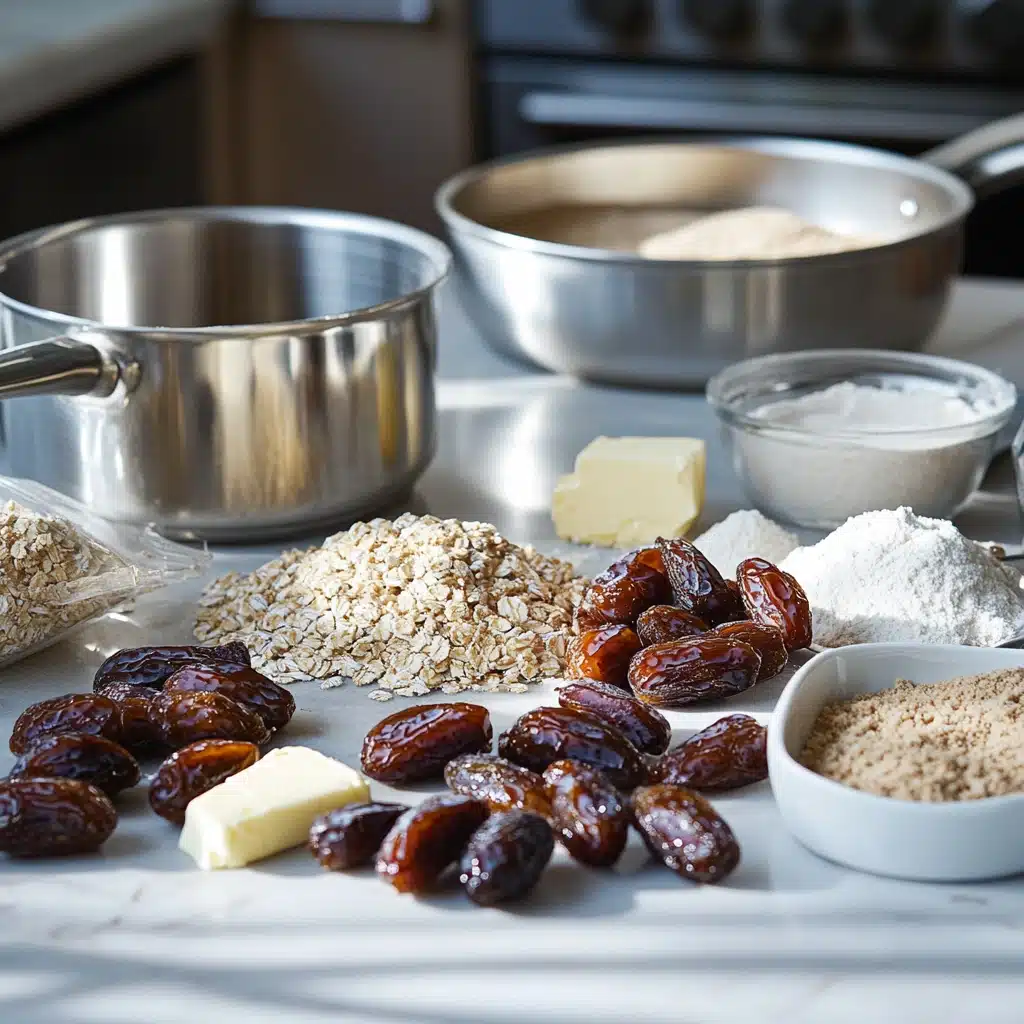
Essential Kitchen Equipment
You’ll need just a few basic tools:
- Medium saucepan (for cooking the date filling)
- Mixing bowls
- Wooden spoon or spatula
- 8×8-inch (20×20 cm) square baking pan
- Parchment paper
- Measuring cups and spoons
These minimal tools make cleanup easy — another reason this recipe has stood the test of time.
Step-by-Step Preparation Instructions
Step 1: Make the Date Filling
In a medium saucepan, combine the chopped dates and water. Bring to a simmer over medium heat and cook for 5–7 minutes, stirring occasionally until the dates begin to soften and break down.
Add baking soda and continue to stir — the mixture will bubble slightly and thicken into a jam-like consistency. Stir in vanilla extract (and lemon juice or zest, if using), then remove from heat and let cool slightly.
This sweet, sticky filling is the heart of the recipe — smooth, fragrant, and naturally caramelized.
Step 2: Prepare the Crumble
In a large bowl, mix flour, oats, brown sugar, baking soda, and salt. Pour in the melted butter and stir until crumbly. The mixture should hold together when pressed but still feel sandy.
Step 3: Assemble the Layers
Line your baking pan with parchment paper. Press half of the oat mixture firmly into the bottom of the pan to create a solid base. Spread the date filling evenly on top, then crumble the remaining oat mixture over the filling, pressing lightly to form the topping.
Step 4: Bake
Preheat oven to 350°F (175°C). Bake for 25–30 minutes, or until the top is golden brown and fragrant.
Step 5: Cool and Slice
Allow the pan to cool completely before slicing — this ensures clean, neat bars that hold their shape. For perfect cuts, refrigerate for 30 minutes before serving.
And just like that, your home will smell like a bakery filled with warm butter and nostalgia.
How to Make the Perfect Date Filling
A great date filling should be smooth but not runny, thick but spreadable. Here’s how to nail it every time:
- Use fresh, soft dates — if your dates are dry, soak them in warm water for 15 minutes first.
- Don’t skip baking soda — it breaks down the dates faster and creates a creamy texture.
- Add citrus zest or juice to balance sweetness and add brightness.
- Stir constantly — the mixture can stick easily once thickened.
This filling also works beautifully in date cookies or layered breakfast parfaits. Try pairing it with Greek yogurt for a wholesome morning treat.
Variations and Recipe Swaps
You can easily customize your date squares recipe to suit your taste:
- Nutty twist: Add ½ cup chopped walnuts or pecans to the oat mixture.
- Coconut crumble: Replace ¼ cup oats with shredded coconut for a tropical note.
- Small batch version: Halve the ingredients and bake in a loaf pan.
- Gluten-free: Substitute flour with a 1:1 gluten-free blend.
- Vegan: Use plant-based butter alternatives — the flavor stays rich and buttery.
If you love cozy, old-fashioned desserts like this, you might also enjoy Pumpkin Twists from Lyndy’s Kitchen — another nostalgic favorite with that homemade warmth we crave.
Common Mistakes to Avoid When Baking Date Squares
- Overbaking: Watch closely — they should be lightly golden, not dark brown.
- Using unsoaked dates: Dry dates won’t soften properly.
- Not cooling fully: Cutting too soon will cause crumbling.
- Skipping parchment paper: Makes removal and slicing much harder.
- Too much butter: Can cause the bars to fall apart instead of holding firm.
Serving Suggestions and Presentation Tips
Serve Old-Fashioned Date Squares warm or chilled. For a classic look, cut them into neat squares or slim rectangles and dust lightly with powdered sugar.
Serving ideas:
- Pair with hot coffee or English breakfast tea.
- Top with a scoop of vanilla ice cream for dessert.
- Serve as part of a holiday cookie tray with shortbread or biscotti.
Their simple elegance makes them perfect for gifting — wrap individual squares in parchment and twine for a rustic, homemade touch.
How to Store and Freeze Homemade Date Squares
Room temperature: Store in an airtight container for up to 3 days.
Refrigerator: Keep for up to 1 week for best freshness.
Freezer: Wrap tightly in plastic and freeze for up to 3 months. Thaw overnight in the refrigerator before serving.
To reheat, warm individual squares in the microwave for 10–15 seconds for that fresh-baked aroma.
Healthier or Simple Versions
To make a healthier date bars recipe, try these swaps:
- Use coconut oil instead of butter.
- Reduce sugar by one-third (dates provide plenty of sweetness).
- Choose whole-grain oats for added fiber.
- Add chia seeds or flaxseed to boost nutrition.
You’ll still get that nostalgic flavor with a wholesome, modern twist.
Frequently Asked Questions (FAQ)
1. Can I use fresh dates instead of dried?
Yes — just reduce the water slightly since fresh dates have more moisture.
2. Can I make the filling ahead of time?
Absolutely! Store it in the fridge for up to 3 days or freeze for a month.
3. How can I make them less sweet?
Add a squeeze of lemon juice or use unsweetened coconut in the topping.
4. Can I double this recipe for a crowd?
Yes, bake in a 9×13-inch pan and increase bake time by about 10 minutes.
5. How do I prevent a soggy crust?
Make sure the filling is thick and slightly cooled before layering.
Conclusion and Call to Action
Old-Fashioned Date Squares are proof that the simplest recipes often stand the test of time. With their buttery oat crumble, luscious date filling, and golden-brown finish, they’re everything homemade baking should be — easy, comforting, and full of love.
Bake a batch this weekend, share them with your family, or tuck a few into your lunchbox for an afternoon treat that feels like a hug from Grandma.
If you loved this recipe, share it with your friends, save it for later, and subscribe to the blog for more nostalgic bakes and timeless dessert inspiration.
Print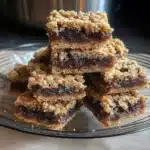
Old-Fashioned Date Squares (Grandma’s Best Recipe Ever!)
- Total Time: 50 minutes
- Yield: 16 squares 1x
- Diet: Vegetarian
Description
Old-Fashioned Date Squares feature a buttery oat crumble layered with a rich, jammy date filling. Soft in the middle and crisp on top, these nostalgic bars taste just like Grandma used to make — cozy, wholesome, and perfect for breakfast, dessert, or an afternoon treat with tea.
Ingredients
For the Oat Crust and Topping:
- 1 ¾ cups (220 g) all-purpose flour
- 1 ½ cups (150 g) rolled oats
- ¾ cup (150 g) brown sugar, packed
- 1 teaspoon baking soda
- ½ teaspoon salt
- 1 cup (225 g) unsalted butter, melted
For the Date Filling:
- 2 cups (300 g) pitted dates, chopped
- 1 cup (240 ml) water
- 1 teaspoon vanilla extract
- ½ teaspoon baking soda
- Optional: 1 tablespoon lemon juice or orange zest
Instructions
- Make the Date Filling: In a saucepan, combine dates and water. Simmer for 5–7 minutes until softened. Stir in baking soda (it will bubble) and cook until thick and jam-like. Add vanilla and optional citrus. Let cool slightly.
- Prepare the Crumble: In a large bowl, mix flour, oats, brown sugar, baking soda, and salt. Add melted butter and stir until crumbly.
- Assemble: Line an 8×8-inch pan with parchment. Press half of the oat mixture into the bottom. Spread the date filling evenly, then top with the remaining oat crumble, pressing lightly.
- Bake: Bake at 350°F (175°C) for 25–30 minutes or until golden brown.
- Cool and Slice: Let cool completely before cutting into squares. For cleaner cuts, refrigerate for 30 minutes before slicing.
Notes
- Make Ahead: Prepare filling up to 3 days in advance or freeze for a month.
- Storage: Keep at room temperature up to 3 days, refrigerate up to 1 week, or freeze up to 3 months.
- Variations: Add chopped walnuts, shredded coconut, or substitute whole wheat flour for a rustic twist.
- Serving: Delicious warm or chilled, paired with coffee, tea, or vanilla ice cream.
- Tip: Don’t overbake — they should stay soft in the middle and golden on top.
- Prep Time: 20 minutes
- Cook Time: 30 minutes
- Category: Dessert, Bars, Old-Fashioned Recipes
- Method: Baked
- Cuisine: North American
Nutrition
- Serving Size: 1 square
- Calories: 230
- Sugar: 22g
- Sodium: 125mg
- Fat: 10g
- Saturated Fat: 6g
- Unsaturated Fat: 3g
- Trans Fat: 0g
- Carbohydrates: 33g
- Fiber: 2g
- Protein: 2g
- Cholesterol: 25mg
Keywords: Old-Fashioned Date Squares, Date Bars, Oatmeal Date Bars, Classic Dessert Bars, Grandma’s Baking Recipes, Homemade Date Squares, Traditional Date Bars