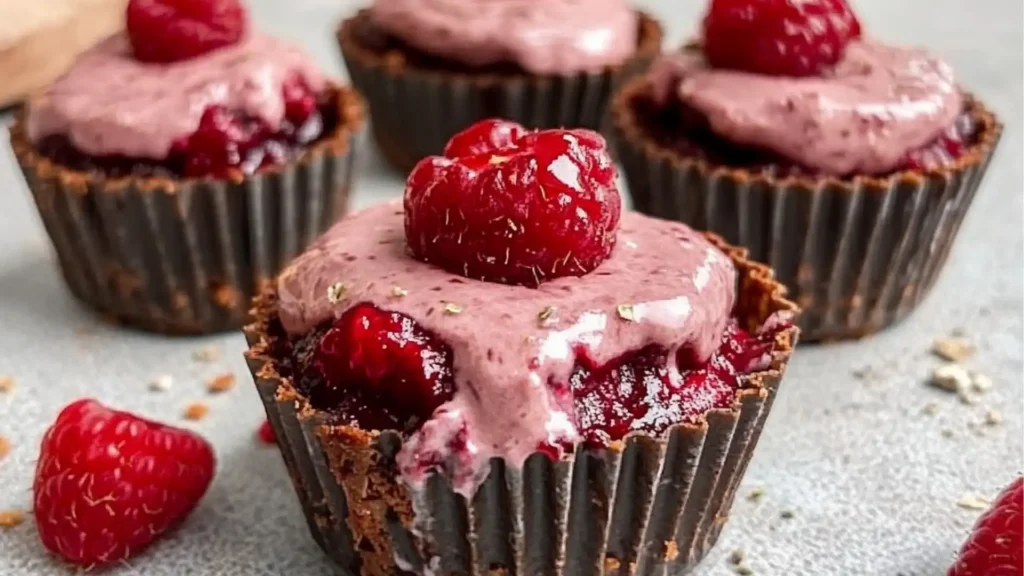
Light, fruity, and elegantly layered, these No-Bake Raspberry Mousse Cups are a perfect treat for anyone looking to impress without turning on the oven. Whether you’re hosting a summer brunch, planning a romantic evening dessert, or simply craving something refreshing and sweet, this recipe fits the bill.
There’s something magical about desserts that require minimal effort but look like they came from a professional patisserie. These mousse cups strike the perfect balance between simplicity and sophistication. The best part? They’re naturally dairy-free and made with wholesome, accessible ingredients you likely already have in your kitchen.
Let’s dive into the creamy, dreamy world of raspberry mousse that’s both indulgent and guilt-free.
Table of Contents
Why You’ll Love These No-Bake Raspberry Mousse Cups
These mousse cups are more than just a pretty face. Here’s why this recipe stands out and has quickly become a favorite among home bakers:
First, it’s a no-bake dessert, which means no oven, no stress, and no heat in your kitchen—perfect for warmer months or when you’re short on time. Secondly, the ingredients are clean and plant-based, making it suitable for a variety of dietary preferences, including vegan and dairy-free lifestyles.
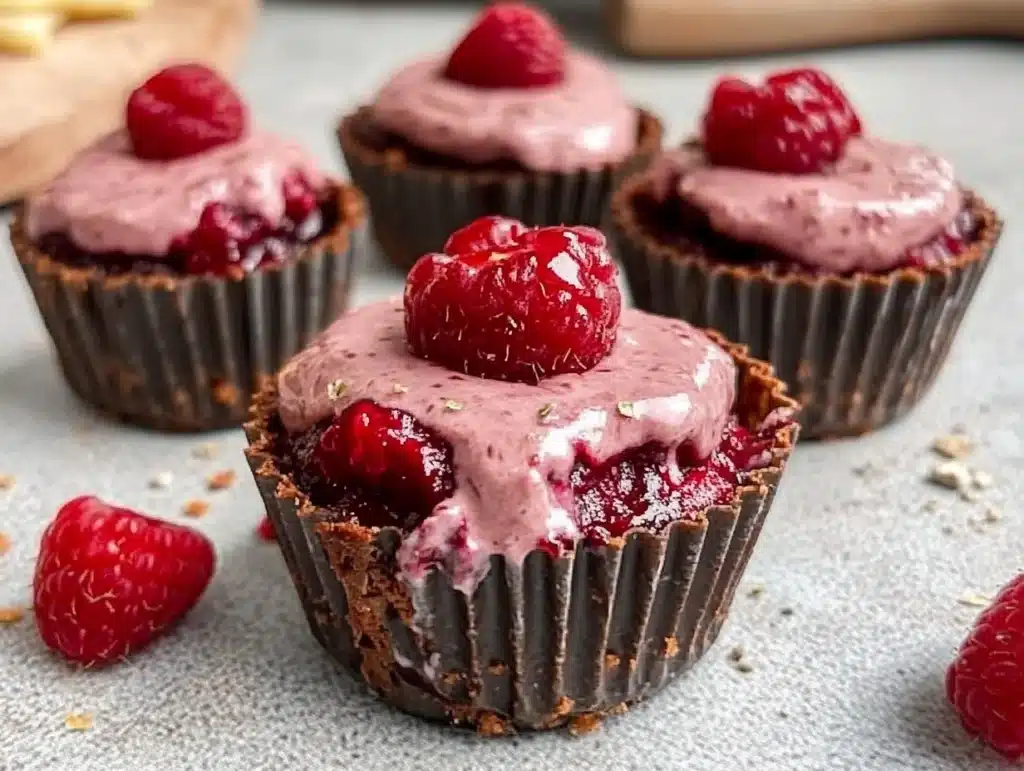
The balance of sweet, tart raspberries with the richness of whipped coconut cream is absolutely divine. Plus, the textural contrast between the chewy, date-based crust and the silky mousse is pure pleasure in every bite.
Finally, these mousse cups look absolutely stunning when served in clear glasses or jars. You’ll love how effortlessly impressive they appear on any dessert table.
Ingredients You’ll Need for No-Bake Raspberry Mousse Cups
To bring these mousse cups to life, you’ll only need a few simple ingredients. Each one contributes to the flavor and texture in a big way.
For the crust layer:
- ½ cup Edward & Sons Organic Unsweetened Shredded Coconut (40g)
- ½ cup pitted dates, chopped (100g)
- 1 tablespoon coconut oil, melted (15ml)
For the raspberry mousse:
- 1 cup fresh raspberries (125g)
- 1 can (13.5 oz) Native Forest Organic Classic Coconut Milk, chilled overnight
- 2 tablespoons maple syrup (30ml)
- 1 teaspoon vanilla extract (5ml)
Optional garnish:
- Fresh raspberries
- Coconut flakes
- Fresh mint leaves
Pro tip: Make sure to refrigerate the coconut milk overnight so that the cream separates and solidifies. This is key to achieving that airy, whipped mousse texture.
Kitchen Equipment Required
Having the right tools on hand makes this recipe even easier to prepare. Here’s what you’ll need:
- Food processor or high-speed blender
- Electric mixer or stand mixer
- Mixing bowls
- Measuring cups and spoons
- Rubber spatula
- Dessert cups, small jars, or ramekins
- Refrigerator space for chilling
Step-by-Step Preparation: How to Make No-Bake Raspberry Mousse Cups
These mousse cups are incredibly simple to assemble, and the results are worth every second.
Step 1: Prepare the crust
In a food processor, combine the shredded coconut, chopped dates, and melted coconut oil. Blend until the mixture holds together when pinched. Divide evenly among your dessert cups and press down gently to form a firm base layer.
Step 2: Whip the coconut cream
Open the chilled can of coconut milk and scoop out the solidified cream into a mixing bowl. Using an electric mixer, whip the cream for 3 to 4 minutes until it becomes fluffy and soft peaks form.
Step 3: Blend the raspberries
In a blender, puree the fresh raspberries until smooth. For a seedless mousse, you can strain the puree through a fine mesh sieve.
Step 4: Make the mousse
Gently fold the raspberry puree, maple syrup, and vanilla extract into the whipped coconut cream using a spatula. Take your time and use light movements to preserve the mousse’s airy texture.
Step 5: Assemble the cups
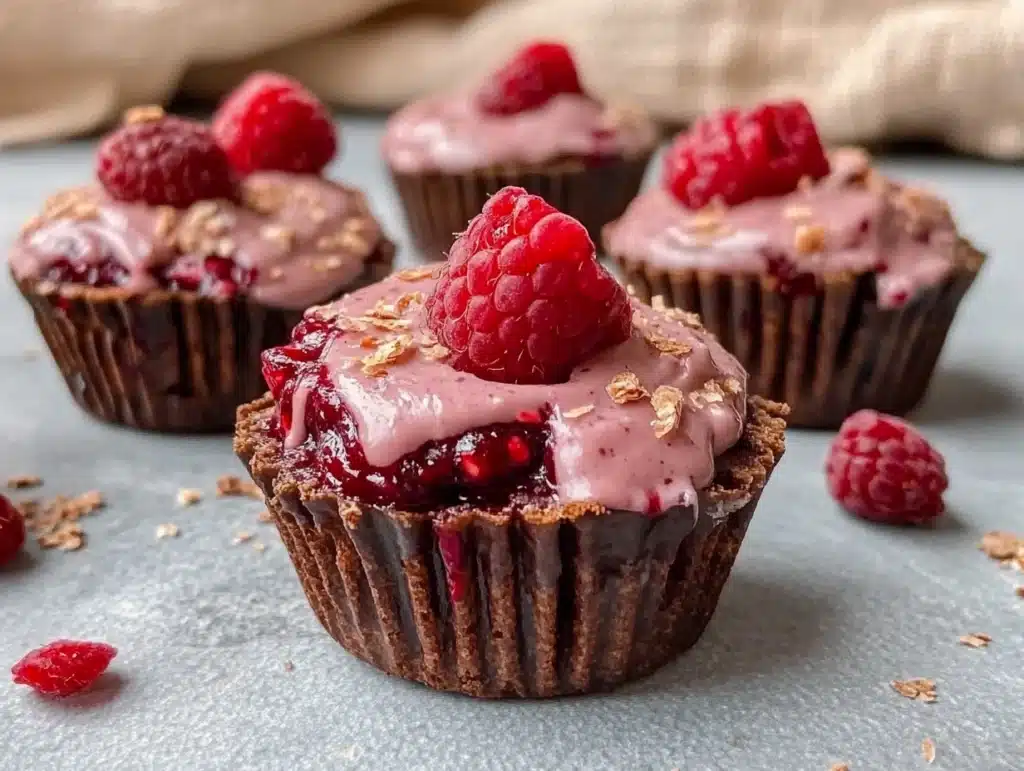
Spoon or pipe the raspberry mousse over the prepared crusts in each cup. Smooth the tops and refrigerate for at least 1–2 hours to allow the mousse to set.
Step 6: Garnish and serve
Top each mousse cup with fresh raspberries, coconut flakes, or mint just before serving for a fresh, colorful finish.
Expert Tips for Perfect No-Bake Raspberry Mousse Cups
For flawless mousse cups every time, keep these expert tips in mind:
- Chill the coconut milk overnight. This allows the cream to separate and makes whipping possible. Don’t skip this step.
- Don’t overmix. Overworking the mousse mixture can deflate the airiness and make the texture too dense.
- Use sweet, ripe berries. The natural sugars in ripe raspberries mean you won’t need to add much extra sweetness.
- Spoon vs. pipe. If presentation matters, use a piping bag for a smooth, swirled look on top.
These simple adjustments can take your mousse from good to unforgettable.
Common Mistakes to Avoid When Making Raspberry Mousse
Even a no-bake recipe has its tricky moments. Here are a few common mistakes to watch out for:
- Using warm coconut milk – It must be chilled long enough to separate the cream.
- Not pressing the crust firmly – A loose crust won’t hold its shape or support the mousse layer.
- Blending everything together too quickly – This can make the mousse watery or lumpy.
- Skipping the chill time – Mousse needs at least an hour or two to firm up before serving.
Avoiding these errors will guarantee that your mousse cups come out as light, fluffy, and flavorful as intended.
Serving and Presentation Tips for Raspberry Mousse Cups
These cups are best served chilled and can be presented in a variety of ways to impress your guests or followers if you’re posting your creation online.
- Use clear glasses or mason jars so the layers are visible.
- Add edible flowers for a garden party vibe.
- Swirl a little extra raspberry puree on top for a gourmet finish.
- For a party, serve mini versions in shot glasses with tiny spoons.
Elegant, Instagram-worthy, and easy? Yes, please.
Creative Variations of No-Bake Raspberry Mousse Cups
Love the concept but want to explore beyond raspberries? Here are some inspired twists you can try:
- Strawberry Coconut Mousse – Swap raspberries for strawberries for a sweeter flavor.
- Mango Raspberry Fusion – Layer mango puree beneath or on top for a tropical combination.
- Chocolate Raspberry Cups – Add cocoa powder to the crust or top the mousse with grated dark chocolate.
- Nutty Crunch Layer – Add crushed almonds, pistachios, or hazelnuts between the crust and mousse.
Each variation offers a slightly different vibe while keeping the no-bake ease intact.
How to Store and Preserve Leftover Raspberry Mousse
If you somehow have leftovers, here’s how to store them properly:
- Refrigerate: Store the mousse cups in the fridge with lids or wrapped in plastic wrap. They stay fresh for up to 3 days.
- Avoid freezing: Freezing can cause the coconut cream to separate and become grainy upon thawing.
- Add garnishes later: Store mousse plain and garnish just before serving to keep everything fresh.
These storage tips make the mousse ideal for meal prepping or planning ahead for a gathering.
Perfect Pairings: What to Serve with Raspberry Mousse Cups
Pairing your mousse with complementary dishes or drinks enhances the overall experience. Here are some pairing ideas:
- A light fruit salad for an all-fruit dessert theme.
- Soft almond or coconut cookies as a crunchy side.
- Herbal teas like chamomile, hibiscus, or mint to balance the tartness.
- A refreshing lemonade or infused water with cucumber or berries.
These simple additions make your mousse cups feel like a complete, well-thought-out dessert offering.

FAQs About No-Bake Raspberry Mousse Cups
Can I use frozen raspberries instead of fresh?
Yes, just make sure to thaw and drain them before blending.
Can I make these ahead of time?
Absolutely. Prepare them a day in advance and keep them chilled until ready to serve.
What if I don’t have a food processor?
You can finely chop the dates and coconut by hand and mix thoroughly with a spoon for a more rustic crust.
Is there a nut-free version?
Yes! This recipe is already nut-free. Just be cautious with any optional toppings like almonds.
Can I make this sugar-free?
You can use a sugar-free maple syrup alternative or omit sweeteners if your raspberries are sweet enough.
Final Thoughts: Share the Love & Stay Connected!
These No-Bake Raspberry Mousse Cups are the kind of dessert that makes you look like a kitchen superstar with minimal effort. Whether it’s a picnic, dinner party, or just a sweet treat after a long day, these mousse cups will brighten your table and satisfy your cravings.
If you enjoyed this recipe, please share it with your friends or family and don’t forget to subscribe to our blog for more wholesome no-bake desserts, healthy recipes, and kitchen inspiration.
Happy no-baking!
Print
No-Bake Raspberry Mousse Cups : Easy Dessert
- Total Time: 2 hours (including chilling)
Description
Light, fruity, and elegantly layered, these No-Bake Raspberry Mousse Cups are a perfect treat for anyone looking to impress without turning on the oven.
Ingredients
For the crust layer:
- ½ cup Edward & Sons Organic Unsweetened Shredded Coconut (40g)
- ½ cup pitted dates, chopped (100g)
- 1 tablespoon coconut oil, melted (15ml)
For the raspberry mousse:
- 1 cup fresh raspberries (125g)
- 1 can (13.5 oz) Native Forest Organic Classic Coconut Milk, chilled overnight
- 2 tablespoons maple syrup (30ml)
- 1 teaspoon vanilla extract (5ml)
Optional garnish:
- Fresh raspberries
- Coconut flakes
- Fresh mint leaves
Instructions
In a food processor, combine the shredded coconut, chopped dates, and melted coconut oil. Blend until the mixture holds together when pinched. Divide evenly among your dessert cups and press down gently to form a firm base layer.
Open the chilled can of coconut milk and scoop out the solidified cream into a mixing bowl. Using an electric mixer, whip the cream for 3 to 4 minutes until it becomes fluffy and soft peaks form.
In a blender, puree the fresh raspberries until smooth. For a seedless mousse, you can strain the puree through a fine mesh sieve.
Gently fold the raspberry puree, maple syrup, and vanilla extract into the whipped coconut cream using a spatula. Take your time and use light movements to preserve the mousse’s airy texture.
Spoon or pipe the raspberry mousse over the prepared crusts in each cup. Smooth the tops and refrigerate for at least 1–2 hours to allow the mousse to set.
Top each mousse cup with fresh raspberries, coconut flakes, or mint just before serving for a fresh, colorful finish.
Notes
- hill the coconut milk overnight. This allows the cream to separate and makes whipping possible. Don’t skip this step.
- Don’t overmix. Overworking the mousse mixture can deflate the airiness and make the texture too dense.
- Use sweet, ripe berries. The natural sugars in ripe raspberries mean you won’t need to add much extra sweetness.
- Prep Time: 20
- Category: Dessert
- Cuisine: American
Nutrition
- Serving Size: 4 servings
- Calories: 320
- Sugar: 5g
- Fat: 12g
- Carbohydrates: 22g
Keywords: Raspberry Recipes Healthy