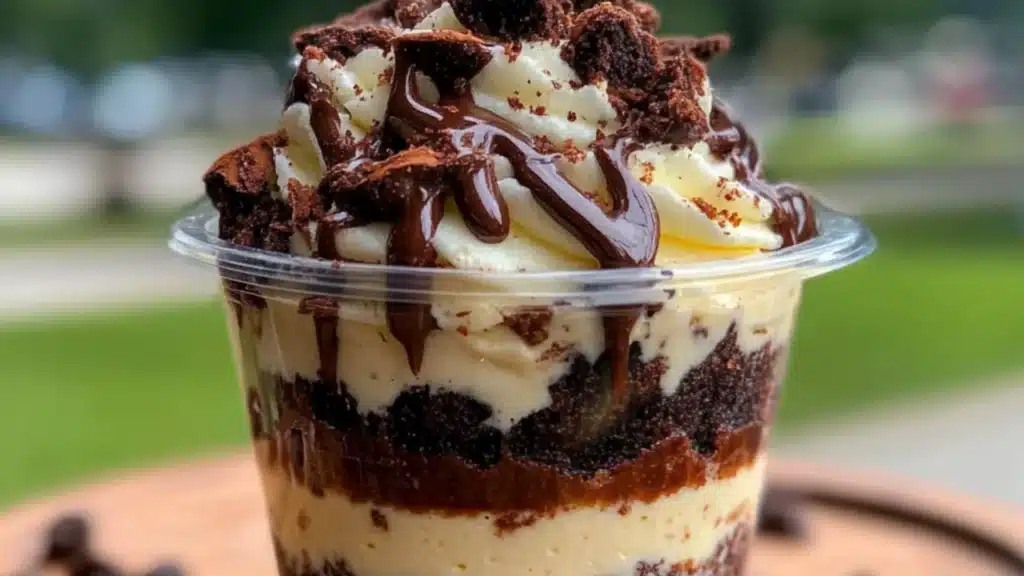
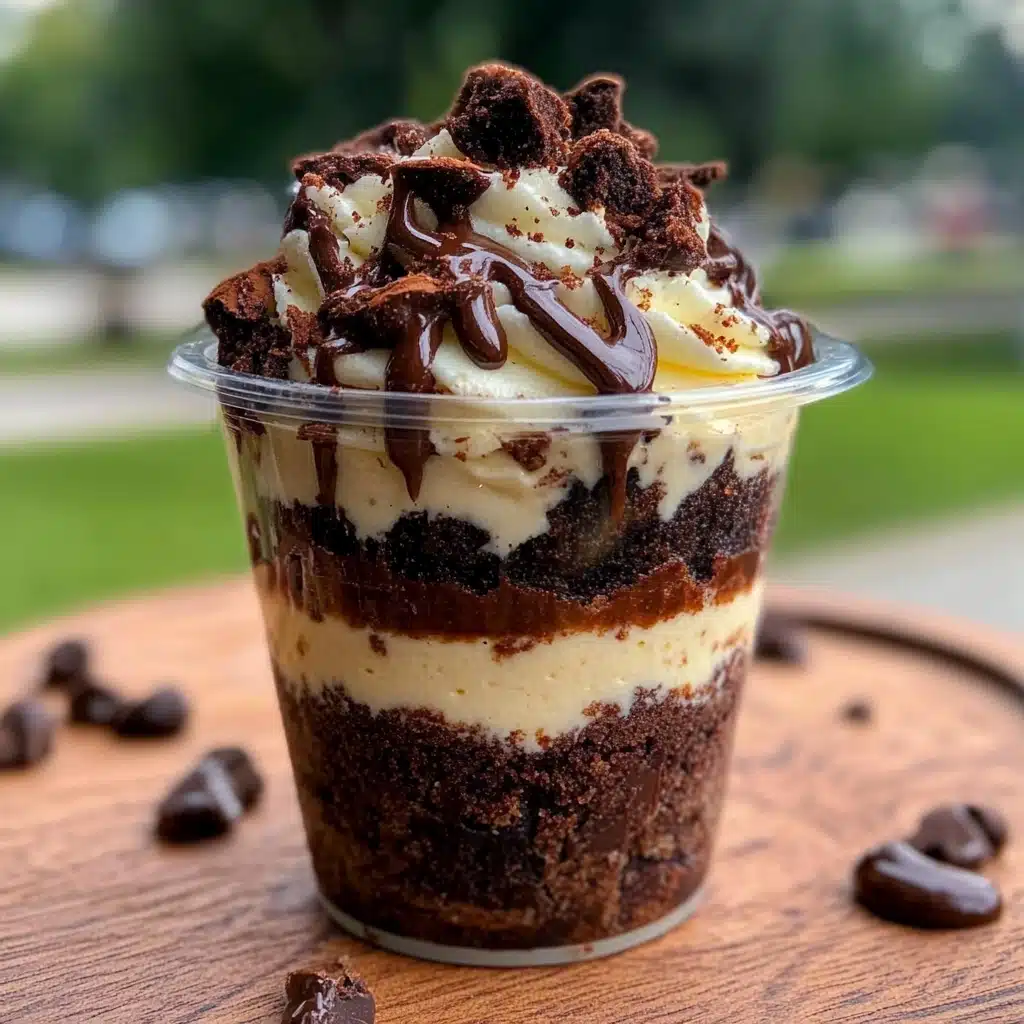
If you’re searching for the ultimate personal-sized dessert that combines rich, fudgy brownies with creamy cheesecake, your search ends here. These Loaded Brownie Cheesecake Dessert Cups are a bite-sized dream, perfect for parties, date nights, or when you simply want to impress. With layers of indulgent textures and flavors, these cups turn everyday ingredients into a gourmet treat—without the need for baking an entire cheesecake. Whether you love chocolate cheesecake cups, or you’re looking for easy date night desserts, this is your next go-to.
Table of Contents
Why These Dessert Cups Are So Popular
Desserts in cups have taken over the dessert world—and for good reason. They’re:
- Perfectly portioned for individual servings
- Visually stunning for dessert tables and parties
- Easy to prepare ahead of time
- Fun to customize with layers, toppings, and textures
What sets these apart from your average cheesecake bites is the cheesecake and cake layer combo. They’re dense, rich, and balanced with the tangy sweetness of the no-bake cheesecake filling.
If you’ve tried other fun treats like these Muffin Tin Mini Apple Pies, then you know how irresistible desserts in personal portions can be!
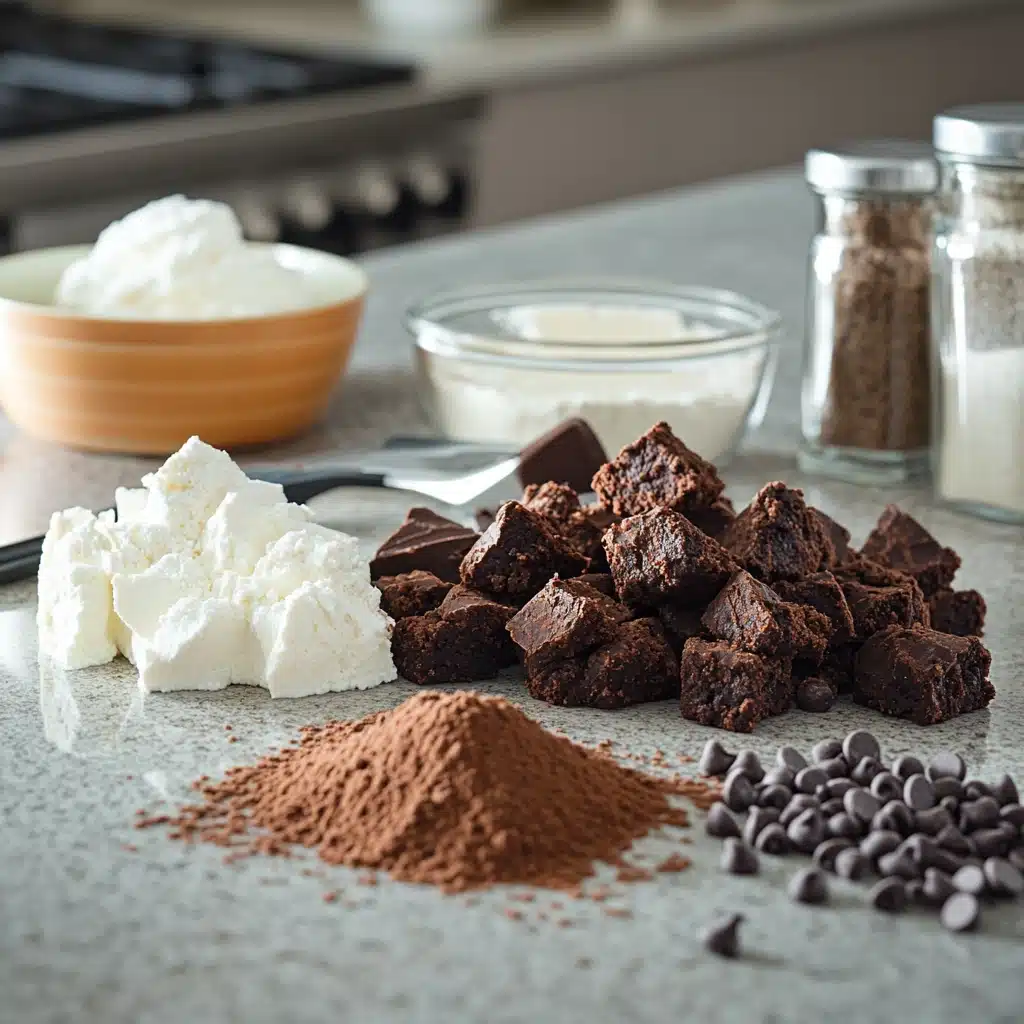
Ingredients You’ll Need
Here’s what you need to make these loaded brownie cheesecake dessert cups. Each ingredient works together to give you that perfect layered bite.
For the Brownie Base:
- 1 box of brownie mix (or homemade brownie batter)
- 2 eggs (as per package or recipe)
- 1/2 cup oil
- 1/4 cup water
For the Cheesecake Layer:
- 8 oz cream cheese, softened
- 1/2 cup powdered sugar
- 1 tsp vanilla extract
- 1/2 cup whipped topping (or homemade whipped cream)
Toppings and Mix-ins:
- Mini chocolate chips
- Crushed cookies (Oreos or chocolate grahams)
- Caramel or chocolate drizzle
- Whipped cream for garnish
- Optional: Chopped nuts or toffee bits
Looking for other layered treats? These Chocolate Chip Cheesecake Bars are another heavenly blend of creamy and crunchy.
Essential Equipment
You don’t need much to create dessert magic in a cup:
- Muffin tin or small dessert cups
- Mixing bowls
- Electric mixer
- Piping bag or spoon for layering
- Measuring cups and spoons
If you enjoy mini creations like this, don’t miss these Pumpkin Cheesecake Truffles for more no-bake inspiration.
How to Make Loaded Brownie Cheesecake Dessert Cups
Let’s walk through each step to make sure your cups come out flawless and delicious.
Step 1: Bake the Brownie Base
Prepare your brownie batter according to the box instructions or your favorite homemade version. Spoon about a tablespoon of batter into the bottom of each cup or muffin liner. Bake at 350°F for 10–12 minutes or until set but still soft in the center. Let cool completely.
Step 2: Whip the Cheesecake Filling
In a mixing bowl, beat the softened cream cheese until smooth. Add powdered sugar and vanilla, and beat until well incorporated. Gently fold in the whipped topping. The result should be light, fluffy, and pipeable.
Step 3: Assemble the Layers
Once the brownie base is cooled, pipe or spoon the cheesecake mixture on top. Sprinkle with mini chocolate chips or crushed cookies. Drizzle with chocolate or caramel sauce.
Step 4: Chill and Serve
Let the cups chill in the refrigerator for at least 1 hour to set. Before serving, top with a dollop of whipped cream and more garnish for that final wow factor.
For another quick-to-make delight, check out these No-Bake Cheerio and Peanut Butter Bars—perfect for gifting or snacking.
Dessert Canapés and Fancy Dessert Trio Ideas
These cups work wonderfully as bite-size cakes for elegant events. You can plate them alongside other small treats for a dessert trio, such as:
- Pumpkin Cheesecake Cookies
- Pumpkin Fluff Dip with graham crackers
- Mini Pumpkin Pie Cups
The variety in flavor and texture creates a complete mini dessert experience.
Creative Variations to Try
While the chocolate and cheesecake combo is iconic, here are a few fun ways to change it up:
- Mint Chocolate: Add a drop of peppermint extract to the cheesecake layer
- Salted Caramel: Swirl in a ribbon of salted caramel before piping
- Fruit Fusion: Top with fresh berries for a refreshing twist
- Pumpkin Swirl: Add pumpkin puree and spice to make it seasonal
These swaps also pair well with fall flavors like in this Pumpkin Bread with Cream Cheese Frosting.
Serving and Presentation Tips
Presentation elevates even the simplest desserts. Here’s how to make your loaded brownie cheesecake dessert cups party-ready:
- Use clear shot glasses or plastic dessert cups
- Pipe the cheesecake layer with a star tip for elegance
- Garnish with color—like raspberries, mint leaves, or gold sprinkles
- Serve on a tiered tray with other minis like Mini Pancake Cereal or Halloween Brownie Bites
Want more visually stunning inspiration? These Strawberry Cheesecake Cinnamon Rolls are a crowd-pleasing showstopper.
Tips for Success
- Don’t Overbake the Brownies: You want them fudgy, not dry
- Use Room Temperature Cream Cheese: For the smoothest filling
- Chill Thoroughly: This helps the layers set and improves texture
- Go Bold with Toppings: Texture and color make every bite exciting
You’ll find similar useful tips in recipes like this Apple Crisp with Oatmeal—another comforting favorite.
How to Store and Make Ahead
Refrigeration: Store in an airtight container for up to 4 days.
Freezing: Freeze the assembled (but ungarnished) cups for up to 2 weeks. Thaw in the fridge overnight before serving.
Make Ahead Tip: Prep brownie bases a day in advance, then add cheesecake filling closer to serving for ultimate freshness.
FAQs About Brownie Cheesecake Cups
Can I use boxed brownies?
Absolutely. They make this recipe fast and easy without sacrificing flavor.
Can I make this gluten-free?
Yes—just use a gluten-free brownie mix and double-check that your toppings are also gluten-free.
Can I freeze them?
Yes, but wait to add whipped cream or fresh toppings until after thawing.
Can I use a muffin tin instead of cups?
Definitely. Just line with cupcake liners and remove after chilling.
Looking for gluten-free options? These Gluten-Free Pumpkin Donuts are just the thing!
Final Thoughts on These Loaded Cheesecake Cups
These Loaded Brownie Cheesecake Dessert Cups are everything you want in a dessert—rich, creamy, chocolatey, and customizable. They’re the kind of treat you’ll want to make again and again, whether it’s for a cozy night in or a fancy get-together.
If you’re a fan of layered desserts and no-fuss baking, try these Strawberry Cloud Cake or Pumpkin Dump Cake, both of which are equally impressive.
Enjoyed the recipe? Share it with a friend, pin it for later, and subscribe to our blog for more unforgettable dessert ideas!
Print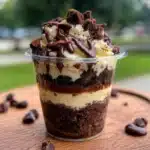
Decadent Loaded Brownie Cheesecake Dessert Cups
- Total Time: 1 hour 30 minutes
- Yield: 12 cups 1x
Description
Loaded Brownie Cheesecake Dessert Cups combine rich, fudgy brownie bases with a creamy no-bake cheesecake layer, creating an indulgent personal-sized dessert perfect for parties, date nights, and chocolate lovers.
Ingredients
-
- For the Brownie Base:
- 1 box of brownie mix (or homemade brownie batter)
- 2 eggs (as per package or recipe)
- 1/2 cup oil
- 1/4 cup water
-
- For the Cheesecake Layer:
- 8 oz cream cheese, softened
- 1/2 cup powdered sugar
- 1 tsp vanilla extract
- 1/2 cup whipped topping (or homemade whipped cream)
- Toppings & Mix-ins:
- Mini chocolate chips
- Crushed cookies (Oreos or chocolate grahams)
- Caramel or chocolate drizzle
- Whipped cream for garnish
- Optional: chopped nuts or toffee bits
Instructions
- Bake the brownie base: Prepare brownie batter according to box or recipe instructions. Spoon about 1 tablespoon of batter into each dessert cup or muffin liner. Bake at 350°F for 10–12 minutes until set but soft. Cool completely.
- Make cheesecake filling: Beat softened cream cheese until smooth. Add powdered sugar and vanilla extract; mix well. Fold in whipped topping gently until fluffy.
- Assemble layers: Pipe or spoon cheesecake mixture over cooled brownie bases. Add mini chocolate chips, crushed cookies, or drizzle caramel/chocolate.
- Chill: Refrigerate cups for at least 1 hour to fully set.
- Serve: Add whipped cream and additional toppings before serving.
Notes
- Flavor variations: Add peppermint extract for mint chocolate, swirl in salted caramel, top with berries, or mix pumpkin puree for a seasonal twist.
- Texture tips: Avoid overbaking brownies for a fudgy base; ensure cream cheese is room temperature for smooth mixing.
- Make ahead: Brownie bases can be prepped 1 day early; assemble cheesecake layer closer to serving.
- Storage: Refrigerate up to 4 days; freeze ungarnished cups for up to 2 weeks.
- Presentation: Use clear dessert cups for layering effect and pipe cheesecake with a star tip for elegance.
- Prep Time: 20 minutes
- Cook Time: 12 minutes
- Category: Dessert
- Method: Baked + No-Bake
- Cuisine: American
Nutrition
- Serving Size: 1 cup
- Calories: 380
- Sugar: 32g
- Sodium: 230mg
- Fat: 22g
- Saturated Fat: 10g
- Unsaturated Fat: 10g
- Trans Fat: 0g
- Carbohydrates: 42g
- Fiber: 2g
- Protein: 5g
- Cholesterol: 55mg
Keywords: Brownie Cheesecake Cups, Dessert Cups, No-Bake Cheesecake, Personal Sized Desserts, Chocolate Cheesecake Cups, Mini Desserts, Date Night Desserts