Homemade Salted Caramel Coffee Creamer : Rich Coffee Treat!
If you love sweet, creamy, and slightly salty caramel flavors in your coffee, this Homemade Salted Caramel Coffee Creamer is about to become your new favorite! Made with simple, natural ingredients, this DIY coffee creamer is not only delicious but also healthier than store-bought alternatives.
Whether you’re looking for a holiday coffee creamer, a homemade creamer with almond milk, or the best coffee creamer recipe to elevate your morning brew, this easy salted caramel creamer will give you café-style flavor at home!
Why You’ll Love This Recipe
- Rich & creamy – Smooth texture with a perfect balance of sweetness and saltiness.
- Customizable – Works with dairy or non-dairy options like almond milk.
- Healthier than store-bought – No artificial flavors or preservatives!
- Perfect for holidays – A great homemade gift for coffee lovers.
Ingredients Needed
For the Salted Caramel Sauce:
- ½ cup (100g) brown sugar
- 2 tablespoons unsalted butter
- ¼ teaspoon sea salt
- ½ cup (120ml) heavy cream
- ½ teaspoon vanilla extract
For the Coffee Creamer Base:
- 1 ½ cups (360ml) whole milk (or almond milk for a dairy-free version)
- 1 cup (240ml) heavy cream (or coconut cream for non-dairy)
- 2 tablespoons pure maple syrup or honey (optional for extra sweetness)
- ½ teaspoon vanilla extract
Kitchen Equipment Required
- Small saucepan
- Whisk
- Measuring cups & spoons
- Mason jars or airtight bottles for storage
Step-by-Step Instructions
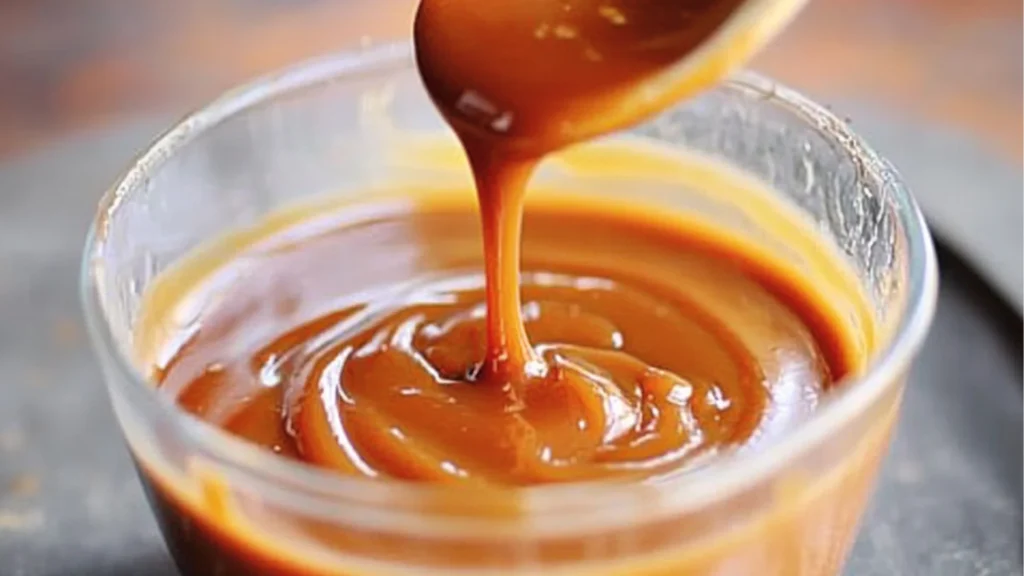
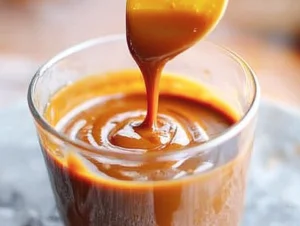
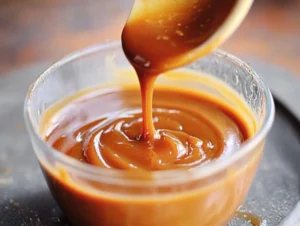
Step 1: Make the Salted Caramel Sauce
- In a small saucepan over medium heat, melt the butter and brown sugar, stirring until combined.
- Add the sea salt and heavy cream, whisking continuously.
- Bring to a gentle simmer and cook for 2–3 minutes, then remove from heat.
- Stir in the vanilla extract and set aside to cool slightly.
Step 2: Prepare the Coffee Creamer
- In another saucepan over low heat, warm the milk and cream (or dairy-free alternative), stirring occasionally. Do not boil.
- Once warm, add the salted caramel sauce and whisk until smooth.
- Stir in vanilla extract and maple syrup (if using).
Step 3: Store & Use
- Pour the homemade coffee creamer into a sterilized mason jar or airtight bottle.
- Let it cool to room temperature before refrigerating.
- Store in the fridge for up to 1 week and shake before each use.
Tips for the Best DIY Salted Caramel Coffee Creamer
- Use high-quality vanilla extract – It enhances the caramel flavor.
- Adjust sweetness – Add more or less sugar depending on your taste.
- Make it dairy-free – Use almond, oat, or coconut milk instead of dairy.
- For extra thickness – Add 1 teaspoon cornstarch while heating the creamer.
Recipe Variations
- Homemade Creamer with Almond Milk – Swap whole milk for almond milk and heavy cream for coconut milk.
- DIY Coffee Mate Creamer – Add ½ teaspoon cinnamon or nutmeg for a spiced version.
- Holiday Coffee Creamer – Mix in a dash of peppermint extract for a festive twist.
- Homemade Healthy Creamer – Use honey or date syrup instead of sugar.
Serving Suggestions
This DIY salted caramel coffee creamer pairs perfectly with:
- Espresso or cold brew coffee
- Iced caramel macchiatos
- Chai lattes for a caramel-spiced touch
- Blended frappés for a homemade coffeehouse treat
How to Store & Can Homemade Coffee Creamer
- Refrigerate: Store in an airtight container for up to 7 days.
- Freeze: Pour into an ice cube tray and freeze for single-serve portions.
- Canning Method: For long-term storage, use sterilized jars and a hot water bath method.
Common Mistakes to Avoid
- Overheating the caramel – Can cause it to burn and turn bitter.
- Skipping the salt – The slight saltiness enhances the caramel flavor.
- Using cold creamer immediately – Let it warm slightly before adding to hot coffee for the best texture.
FAQ Section
Can I use store-bought caramel sauce?
Yes! But homemade caramel adds a richer, more natural taste.
Is this coffee creamer keto-friendly?
Yes! Use heavy cream and a sugar-free sweetener like monk fruit.
How do I make a frothy creamer?
Blend the creamer in a milk frother or shake well before pouring.
Can I make a larger batch?
Absolutely! Just double the ingredients and store in multiple jars.
Conclusion & Call to Action
This Homemade Salted Caramel Coffee Creamer is a delicious, creamy, and healthier alternative to store-bought creamers. Whether you love rich caramel lattes, holiday coffee creamers, or a DIY coffee experience, this recipe is a must-try!
If you enjoyed this recipe, share it with coffee lovers, and don’t forget to subscribe for more homemade coffee creamer recipes!
Homemade Salted Caramel Coffee Creamer : Rich Coffee Treat!

If you love sweet, creamy, and slightly salty caramel flavors in your coffee, this Homemade Salted Caramel Coffee Creamer is about to become your new favorite!
- Small saucepan
- Whisk
- Measuring cups & spoons
- Mason jars or airtight bottles for storage
- For the Salted Caramel Sauce:
- ½ cup 100g brown sugar
- 2 tablespoons unsalted butter
- ¼ teaspoon sea salt
- ½ cup 120ml heavy cream
- ½ teaspoon vanilla extract
- For the Coffee Creamer Base:
- 1 ½ cups 360ml whole milk (or almond milk for a dairy-free version)
- 1 cup 240ml heavy cream (or coconut cream for non-dairy)
- 2 tablespoons pure maple syrup or honey (optional for extra sweetness)
- ½ teaspoon vanilla extract
- Step 1: Make the Salted Caramel Sauce
- In a small saucepan over medium heat, melt the butter and brown sugar, stirring until combined.
- Add the sea salt and heavy cream, whisking continuously.
- Bring to a gentle simmer and cook for 2–3 minutes, then remove from heat.
- Stir in the vanilla extract and set aside to cool slightly.
- Step 2: Prepare the Coffee Creamer
- In another saucepan over low heat, warm the milk and cream (or dairy-free alternative), stirring occasionally. Do not boil.
- Once warm, add the salted caramel sauce and whisk until smooth.
- Stir in vanilla extract and maple syrup (if using).
- Step 3: Store & Use
- Pour the homemade coffee creamer into a sterilized mason jar or airtight bottle.
- Let it cool to room temperature before refrigerating.
- Store in the fridge for up to 1 week and shake before each use.
Use high-quality vanilla extract – It enhances the caramel flavor.
Adjust sweetness – Add more or less sugar depending on your taste.
Make it dairy-free – Use almond, oat, or coconut milk instead of dairy.