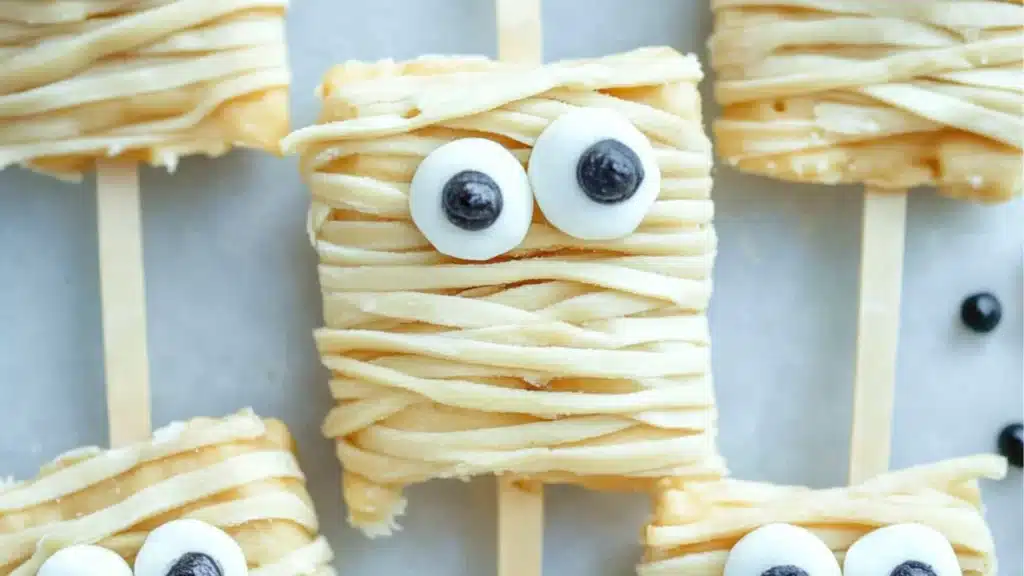
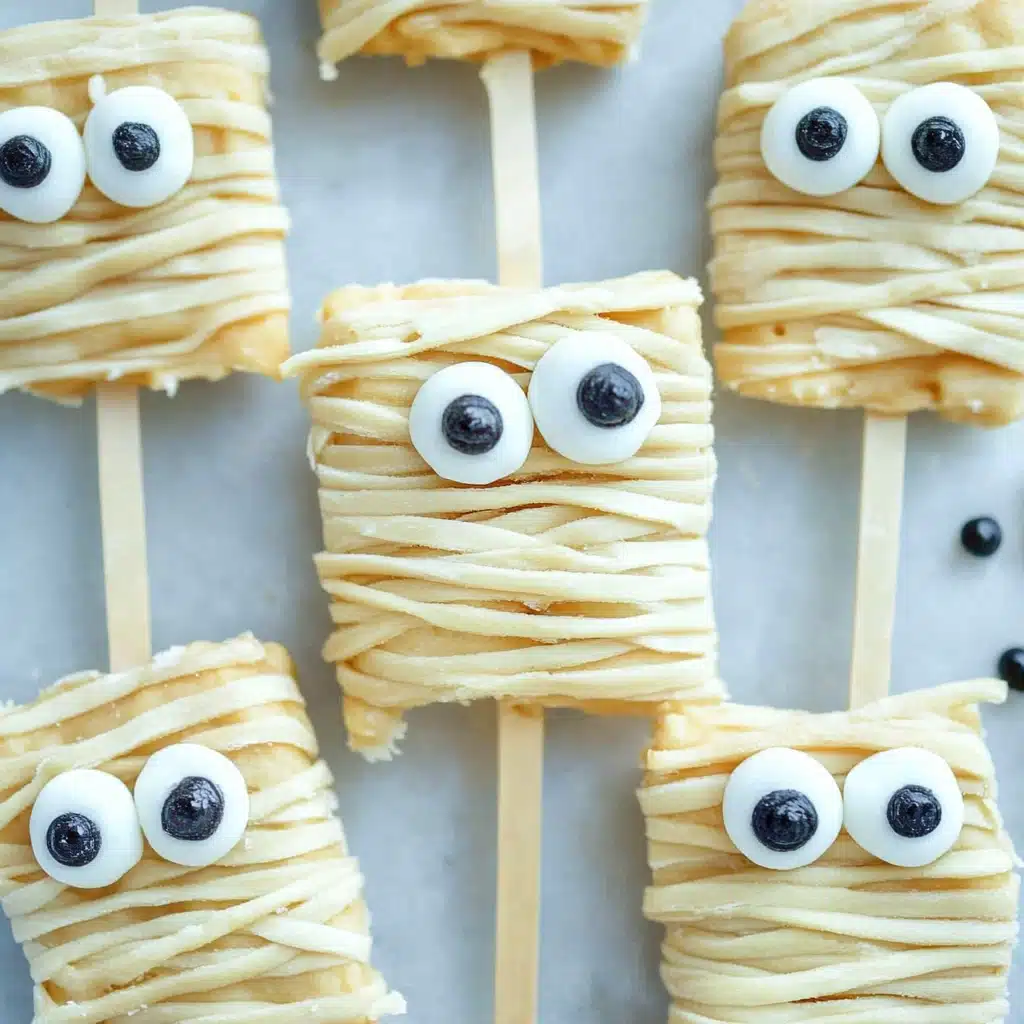
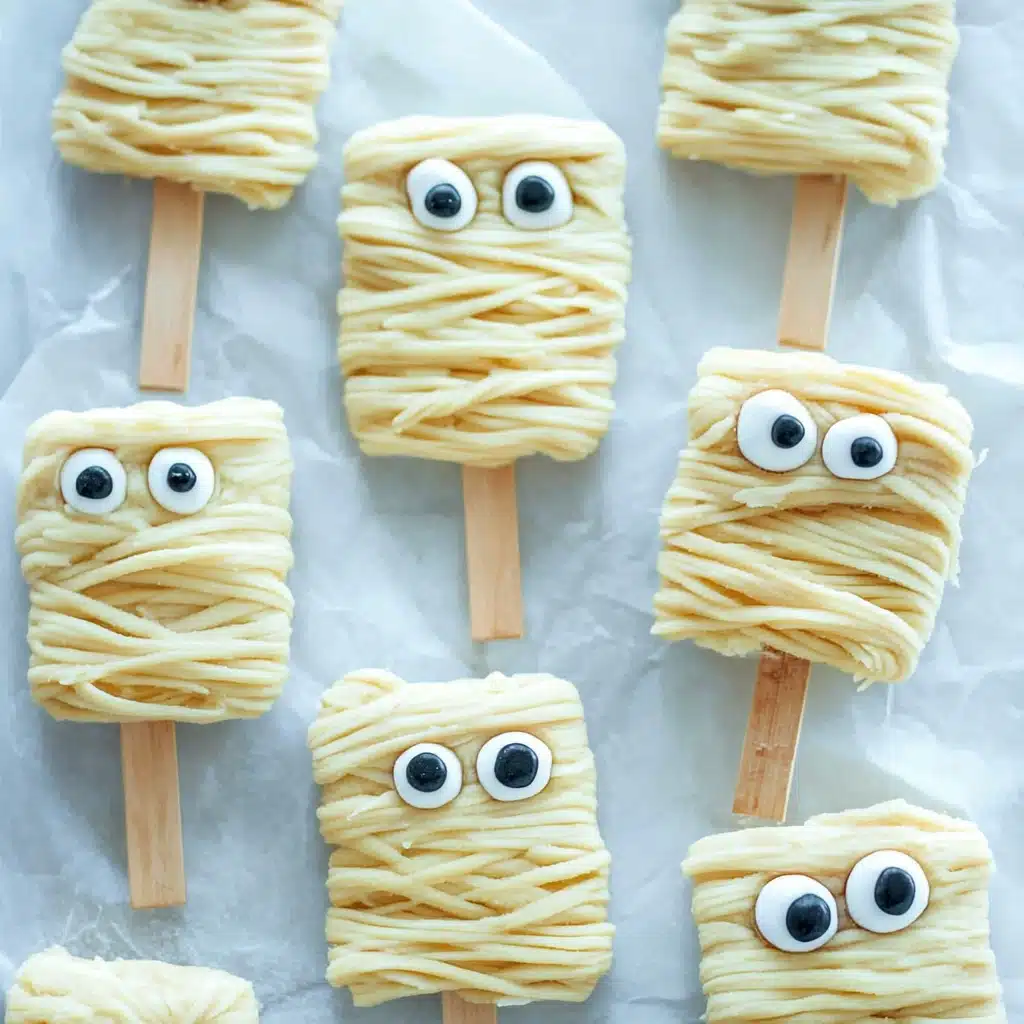
If you’re looking for a Halloween dessert that’s just as adorable as it is delicious, these Halloween Mummy Treats are the perfect choice. Made with soft, chewy Rice Krispie treats wrapped in sweet “bandages,” they’re a fun twist on the classic snack you loved as a kid. The best part? They’re easy to make, totally customizable, and can be adapted into gluten-free Halloween treats for school or even dairy-free, allergy-friendly Halloween snacks.
Whether you’re hosting a spooky party, need a Halloween treat for the classroom, or simply want an afternoon craft you can eat, these little mummies are guaranteed to be a hit.
Table of Contents
Why These Spooky Rice Krispie Mummies Are a Party Hit
Halloween is all about treats that make people smile before they even take a bite. These mummy Rice Krispie treats are not only sweet and crispy, but they also have an instantly recognizable look that will get everyone talking.
Visual appeal: The white chocolate drizzle mimics mummy bandages perfectly.
No baking required: Great for busy parents or last-minute party prep.
Crowd-pleasing flavor: Sweet, chewy, and a little crunchy—just like the classic cereal snack.
If you love fun and creative holiday recipes, you might also enjoy our Mini Halloween Pizzas for a savory twist.
Perfect for Kids, Classrooms, and Allergy-Friendly Celebrations
One of the best parts about these mummy treats is how easy it is to make them safe for everyone. Simply use gluten-free crispy rice cereal, dairy-free chocolate, and allergy-safe candy eyes for a treat that all the little ghosts and goblins can enjoy.
They’re perfect for:
- School snack tables where allergies need to be considered.
- Halloween party treats for mixed-age gatherings.
- Family baking nights with the kids helping decorate.
Why These Halloween Rice Krispie Treats Are So Popular
Aside from being undeniably cute, these mummies are:
- Fast to make – done in under 30 minutes.
- Mess-free to serve – no forks or plates needed.
- Customizable – use white, milk, or dark chocolate “bandages.”
They’re a playful alternative to cookies or cupcakes and pair perfectly with other themed snacks like our Halloween Eyeball Pasta Salad.
Ingredients for Halloween Mummy Treats
Main Ingredients
- 6 cups crispy rice cereal (use gluten-free if needed)
- 4 tablespoons butter (or dairy-free butter substitute)
- 1 package (10 oz) marshmallows (check for allergy-friendly brands)
- 1 cup white chocolate chips or melting wafers (use dairy-free if needed)
- Candy eyeballs for decoration
Gluten-Free and Dairy-Free Ingredient Options
- Gluten-free cereal such as certified GF Rice Krispies or Nature’s Path.
- Dairy-free chocolate from Enjoy Life or Hu Kitchen.
- Vegan marshmallows like Dandies for plant-based diets.
Kitchen Tools You’ll Need
- Large mixing bowl
- Saucepan or microwave-safe bowl
- Rubber spatula
- Baking sheet lined with parchment paper
- Small piping bag or plastic sandwich bag for drizzling chocolate
Step-by-Step Instructions for Making Rice Krispie Mummies
1. Preparing the Base for Halloween Rice Crispy Treats
In a saucepan, melt the butter over low heat. Add marshmallows and stir until smooth. Remove from heat and stir in cereal until evenly coated.
2. Shaping the Mummies
Press the mixture into a parchment-lined baking dish. Once cooled slightly, cut into rectangles or oval shapes—these will be the mummy “bodies.”
3. Adding the Final Spooky Touches
Melt the white chocolate and pour it into a piping bag. Drizzle over each treat in crisscross patterns to mimic mummy bandages. Before the chocolate sets, place two candy eyeballs near the top of each treat.
If you want another easy no-bake Halloween snack, check out our Halloween Crack for a sweet and salty option.

How to Make Easy Healthy Halloween Treats
Reducing Sugar and Using Natural Ingredients
- Use unsweetened puffed rice instead of sugary cereals.
- Swap white chocolate for coconut butter drizzle.
- Use dye-free candy eyes or homemade chocolate chips.
Allergy-Free Substitutions for Gluten and Dairy
These mummies work beautifully with gluten-free and dairy-free swaps, so everyone at your Halloween party can enjoy them without worry.
Tips for the Best Kid-Friendly Halloween Treats
How to Keep Them Fresh for School or Parties
- Store in an airtight container for up to 3 days.
- Wrap individually in plastic wrap for easy grab-and-go snacks.
Getting Creative with Mummy Designs
- Try colored candy melts for blue, green, or purple “monster” mummies.
- Add gummy worms peeking out from under the bandages.
Recipe Variations
Colored Mummies for Extra Fun
Tint white chocolate with food-safe coloring for rainbow mummy designs.
Chocolate-Dipped Mummies
Dip the bottoms of each treat in dark or milk chocolate for extra flavor.
Mini Mummy Bites for Small Kids
Use a small cookie cutter to make bite-sized mummies—perfect for preschoolers.
You can pair them with a savory snack like our Crescent Roll Mummy Hot Dogs for a complete themed menu.
Serving Ideas for Halloween Food Treats
How to Display Mummy Treats for a Party Table
Arrange on a spooky black platter with candy corn scattered around. Add plastic spiders for a creepy touch.
Packaging for School-Friendly Portions
Slip into small treat bags tied with orange or black ribbon. Label them “Mummy Snacks” for extra fun.
How to Store and Make Ahead
Storing at Room Temperature or Freezing
These treats keep best at room temperature in a sealed container for 2–3 days. Avoid refrigeration, as it can make them hard.
Prepping in Advance for Busy Holidays
Make the base Rice Krispie treats up to 2 days before and decorate with chocolate and eyes the night before serving.
Common Mistakes to Avoid
- Overheating marshmallows, which can make the treats hard.
- Adding candy eyes before the chocolate drizzle—they won’t stick well.
- Storing in the fridge, which changes the texture.
FAQs About Halloween Mummy Treats
Q: Can I make these without marshmallows?
Yes, you can use brown rice syrup and nut or seed butter as a binder for a healthier version.
Q: How can I make these vegan?
Use vegan marshmallows, dairy-free butter, and vegan white chocolate.
Q: Can I make them the day before?
Absolutely—they’ll still taste fresh if stored properly in an airtight container.
Final Thoughts and Call to Action
These Halloween Mummy Treats are the perfect mix of spooky and sweet. With just a few ingredients and minimal effort, you can create an allergy-friendly dessert that will be the star of your Halloween table. Whether you make them for school, a party, or a cozy night in with the family, these little mummies will disappear fast—no ghostly magic required.
For more festive Halloween ideas, explore our Halloween Recipes Collection filled with creative snacks, treats, and party food to make your celebration unforgettable. And don’t forget to share your mummy treat creations on social media to inspire fellow Halloween food lovers!
Print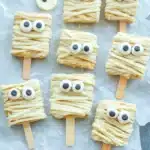
Fun and Spooky Halloween Mummy Treats Kids Will Love
- Total Time: 25 minutes
- Yield: 12 servings 1x
Description
These Halloween Mummy Treats are a fun, no-bake way to celebrate spooky season. Made with chewy rice crispy cereal bars wrapped in sweet white chocolate “bandages” and topped with candy eyes, they’re festive, kid-friendly, and easily adapted for gluten-free, dairy-free, or allergy-free diets.
Ingredients
- 6 cups rice crispy cereal (use certified gluten-free if needed)
- 4 tbsp butter (or dairy-free margarine)
- 1 package (10 oz) mini marshmallows (check for allergy-safe brands)
- 1 cup white chocolate chips (or dairy-free white chocolate)
- Candy eyes
- Optional: A pinch of salt
- Optional: Natural food coloring for tinted “bandages”
Instructions
- Prepare the pan: Line a 9×13-inch baking dish with wax paper and lightly grease.
- Melt the marshmallow mixture: In a large saucepan over low heat, melt butter. Add marshmallows and stir until smooth.
- Add cereal: Remove from heat and gently stir in rice crispy cereal until fully coated.
- Press into pan: Spread evenly in the dish and let cool for 15 minutes.
- Cut into rectangles: Slice cooled mixture into bars.
- Decorate: Melt white chocolate in microwave, transfer to piping bag, and drizzle over bars to create “bandages.”
- Add eyes: Place candy eyes before chocolate sets.
- Set and serve: Allow chocolate to harden, then serve or store.
Notes
- For gluten-free: use certified GF cereal, marshmallows, and candy eyes.
- For dairy-free: use dairy-free butter and white chocolate.
- Overheating marshmallows can cause hard treats — melt over low heat.
- Best served at room temperature; avoid refrigerating to keep texture crisp.
- Prep Time: 15 minutes
- Cook Time: 10 minutes
- Category: Dessert
- Method: No-Bake
- Cuisine: American