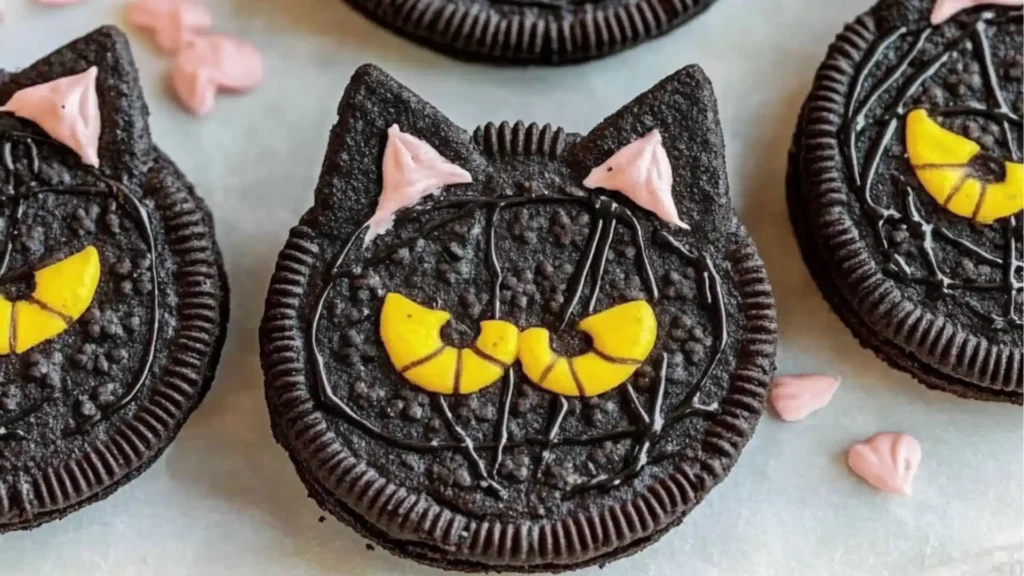
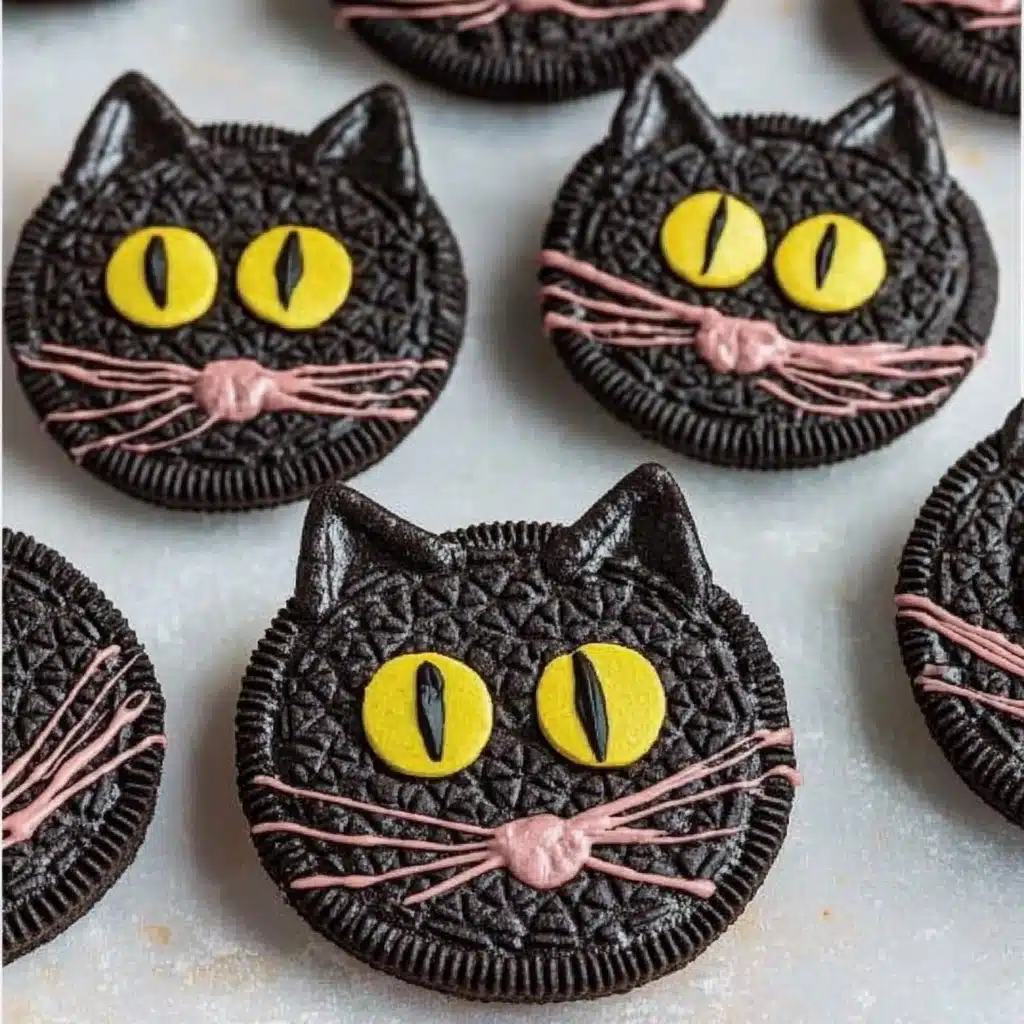
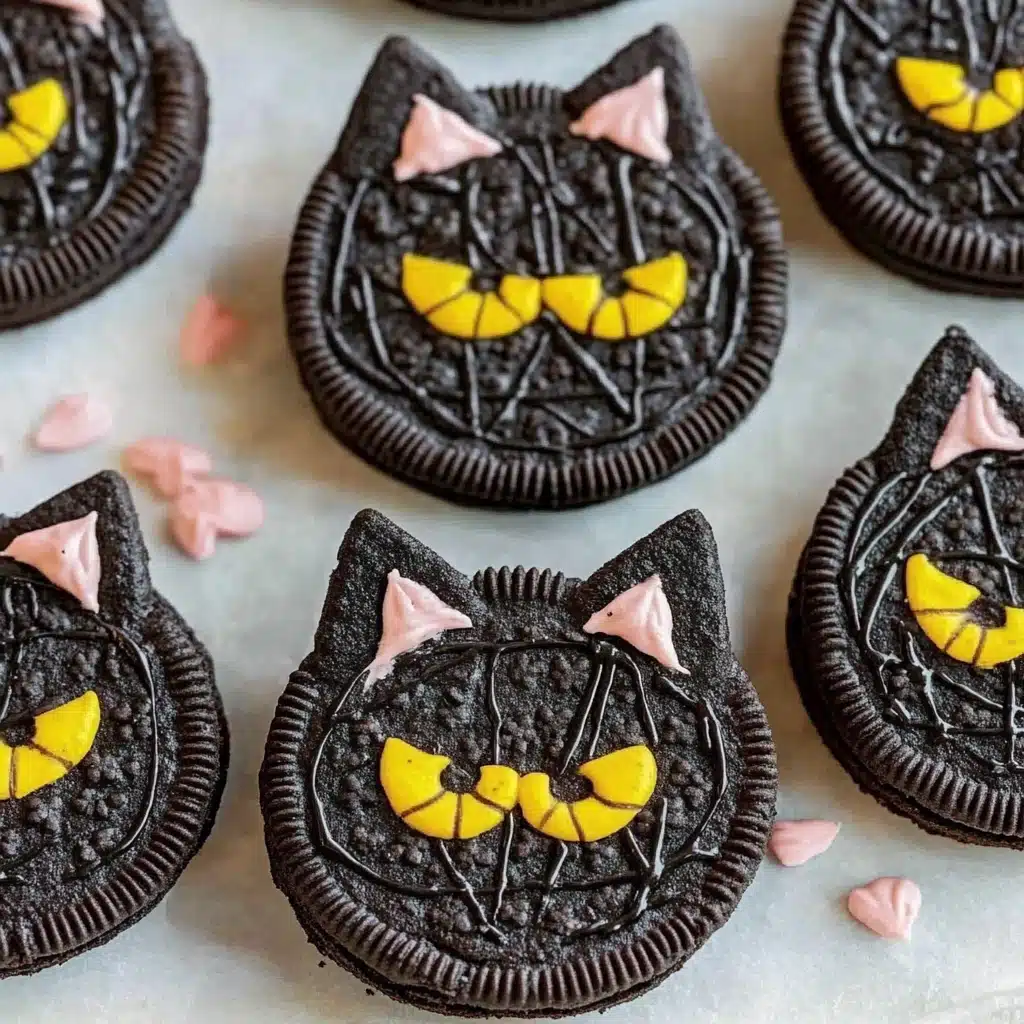
Halloween is all about mixing spooky fun with delicious treats, and these Halloween Black Cat Oreo Treats deliver both in the most adorable way. With their wide candy eyes, pointy chocolate ears, and sweet Oreo base, they’re a purr-fect blend of cute and creepy. Best of all, they’re a no-bake dessert you can make in under 30 minutes, making them ideal for parties, school events, or last-minute Halloween prep.
These Oreo Halloween treats are not only easy to assemble, but they’re also kid-friendly, so your little helpers can join in the fun. The simple ingredients and playful design mean that anyone—no matter their baking skill level—can whip up these charming black cat desserts.
If you love themed seasonal snacks, you might also enjoy our Mini Halloween Pizzas for a savory addition to your spooky spread.
Table of Contents
Why These Adorable Cookies Are Perfect for Halloween
Black cats have been part of Halloween folklore for centuries, often symbolizing mystery and magic. Turning them into edible treats brings that charm to your dessert table. The combination of chocolate, frosting, and Oreos gives these black cat dessert ideas an irresistible flavor that guests of all ages will love.
Whether you’re making them for a classroom party, a neighborhood gathering, or just a cozy night in with the family, these cookies add a festive touch without a lot of fuss.
What Makes These Oreo Halloween Treats So Special
A No-Bake Dessert Anyone Can Make
You don’t need an oven or fancy baking skills—just Oreos, candy, and a little creativity.
Kid-Friendly and Classroom-Safe
Since these don’t require heat or sharp tools, they’re perfect for kids to help with. You can even set up a “decorate your own cat” station at a Halloween party.
Ingredients You’ll Need for Halloween Black Cat Oreo Treats
Choosing the Right Oreo Cookies
- Regular Oreos work perfectly, but you can also use Double Stuf for a thicker base.
- Try chocolate creme-filled Oreos for an even darker look.
Candy Decorations for the Perfect Cat Face
- Candy eyes (available at most craft or baking stores)
- Pink or red candy-coated chocolates for noses
- Licorice strings or pretzel sticks for whiskers
Frosting and Chocolate for Assembly
- Black or chocolate frosting as edible glue
- Chocolate chips (for ears) or small triangular candies
For another playful Halloween recipe, check out our Halloween Eyeball Pasta Salad—it’s equally spooky and fun.
Essential Kitchen Tools
Small offset spatula or butter knife for spreading frosting
- Piping bag (optional) for detailed whisker placement
- Baking sheet lined with parchment for easy setup
- Small bowls for organizing candy decorations
Step-by-Step Guide to Making Black Cat Oreo Treats
1. Preparing the Oreo Base
Place your Oreos on a parchment-lined baking sheet to prevent sticking.
2. Adding the Ears and Eyes
Use a dab of frosting to attach two chocolate chips to the top of each Oreo as ears. Add candy eyes just below the ears, pressing gently to secure.
3. Creating the Whiskers and Nose
Place the pink or red candy-coated chocolate in the center as the nose. Arrange licorice strings or pretzel sticks on each side for whiskers, securing them with tiny dots of frosting.
4. Letting the Treats Set
Allow your decorated Oreos to sit at room temperature for 10–15 minutes so the frosting firms up. If you need them ready quickly, pop the tray into the fridge for 5 minutes.
If you like easy, themed snacks, try our Crescent Roll Mummy Hot Dogs for a savory Halloween bite.
Creative Cat-Themed Treat Variations
Halloween Owl Treats Using Oreos
Swap the ears for larger chocolate candies and tilt the eyes to give your cookies a whimsical owl look.
Mini Black Cat Cupcakes
Use cupcakes as the base and decorate them with frosting and candy to mimic the Oreo cats.
Oreo Cake Pops with Cat Faces
Crush Oreos into crumbs, mix with cream cheese, shape into balls, and dip in black candy coating before decorating.
Tips for Perfect Halloween Cat Desserts
Keeping Oreos from Cracking
Press decorations gently to avoid breaking the cookies. If they do crack, a dab of melted chocolate can act as glue.
Getting Even Frosting Coverage
Use a piping bag or small spatula to spread frosting evenly and keep decorations secure.
Serving and Presentation Ideas
Using Themed Platters and Stands
Serve your black cat cookies on a black or orange platter for a festive touch.
Pairing with Other Halloween Treats
Mix and match with themed sweets like Vampire Fudge and Halloween Popcorn for a colorful dessert spread.
Make-Ahead and Storage Tips
How to Store Oreo Halloween Treats for Freshness
Keep in an airtight container at room temperature for up to 3 days.
Freezing and Thawing Without Mess
You can freeze decorated Oreos for up to 1 month—just place parchment between layers. Thaw at room temperature for 30 minutes before serving.
Common Mistakes to Avoid
- Using too much frosting—it can cause decorations to slide off.
- Storing in a humid environment—moisture makes Oreos soft.
- Overhandling the cookies after decorating—let them set before stacking.
FAQs About Black Cat Dessert Ideas
Q: Can I use flavored Oreos?
Absolutely—pumpkin spice, mint, or caramel Oreos can add a unique twist.
Q: How do I make these allergy-friendly?
Use gluten-free Oreos and dairy-free chocolate chips to suit dietary needs.
Q: Can I make these with homemade cookies?
Yes, any round cookie will work, but Oreos hold up best for decorating.
Final Thoughts and Halloween Fun
These Halloween Black Cat Oreo Treats are proof that you don’t need complicated recipes to create memorable holiday desserts. With minimal prep time and maximum cuteness, they’re a hit at any Halloween celebration.
If you make a batch, share your photos online and inspire others to join in the spooky fun. For even more Halloween ideas, try our Halloween Crack for a sweet-and-salty treat everyone will love.
Print
Adorably Spooky Halloween Black Cat Oreo Treats – Easy, Fun & Kid-Friendly
- Yield: 24 cookies 1x
Description
Halloween Black Cat Oreo Treats are no-bake, kid-friendly cookies made by dipping Oreos in melted chocolate and decorating them with candy eyes, “ear” candies, and whiskers. They’re quick to assemble, party-perfect, and a fun hands-on project for little helpers.
Ingredients
Coating & Cookies:
- 24 Oreo cookies (regular or double-stuffed)
- 1 cup semi-sweet chocolate chips (for melting)
- 1 tbsp coconut oil or shortening (for smooth melting)
- Black candy melts or dark chocolate for coating (optional/alternative)
Decorations:
- 48 candy eyes (two per cat)
- Black licorice laces or chocolate sprinkles (for whiskers)
- Mini chocolate chips or small candy-coated chocolates (for ears)
- Frosting or edible glue (to attach decorations)
Tools:
- Microwave-safe bowl or double boiler (for melting chocolate)
- Small spoon or offset spatula
- Piping bag or small zip-top bag (optional for details)
- Toothpicks or tweezers (precision placement)
- Wax or parchment paper; baking sheet
Instructions
- Prep workspace: Line a baking sheet with parchment and set out candy eyes, mini chips, and other decorations for quick assembly.
- Melt coating: In a microwave-safe bowl, combine chocolate chips and coconut oil. Heat in 30-second intervals, stirring until smooth (or melt gently over a double boiler).
- Dip cookies: Using a fork, dip each Oreo into the melted chocolate, tap off excess, and place on the prepared sheet.
- Decorate faces: While coating is still soft, add two candy eyes near the top center. Place mini chips at the top edges for ears (points up). Add whiskers with licorice laces or sprinkles; use frosting or edible glue as needed.
- Set: Let sit at room temperature or refrigerate 10–15 minutes until the coating firms up.
Notes
- Tips: Work quickly so decorations adhere before the coating sets. If chocolate thickens, rewarm briefly and stir smooth. Use tweezers/toothpicks for precision.
- Variations: Owls (candy corn beaks; large round candy eyes); Bats (attach Oreo half “wings” to sides); Pumpkin Cats (orange melts base + black cat faces).
- Common mistakes: Overheating chocolate (seizing), decorating too late (won’t stick), adding too many whiskers (cluttered look).
- Storage: Airtight container up to 5 days at room temp; chill for a firmer bite. Avoid humidity which makes coating sticky.
- Allergy/diet swaps: Use gluten-free sandwich cookies for GF; use dark/semi-sweet chocolate instead of candy melts if preferred (finish may be less glossy).
- Kid activity: Set up a decorating station so each child can design 2–3 unique cats.
- Category: Dessert
- Method: No-Bake, Dipped/Coated
Keywords: Halloween Black Cat Oreo Treats, No bake Halloween cookies, Kid-friendly Halloween treats, Black cat cookies, Oreo Halloween treats, Halloween party desserts