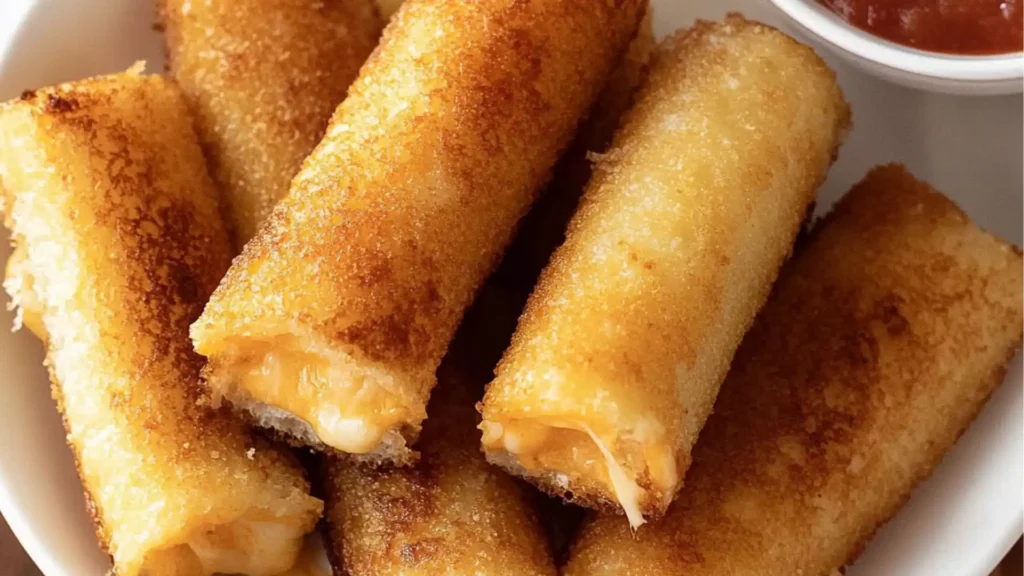
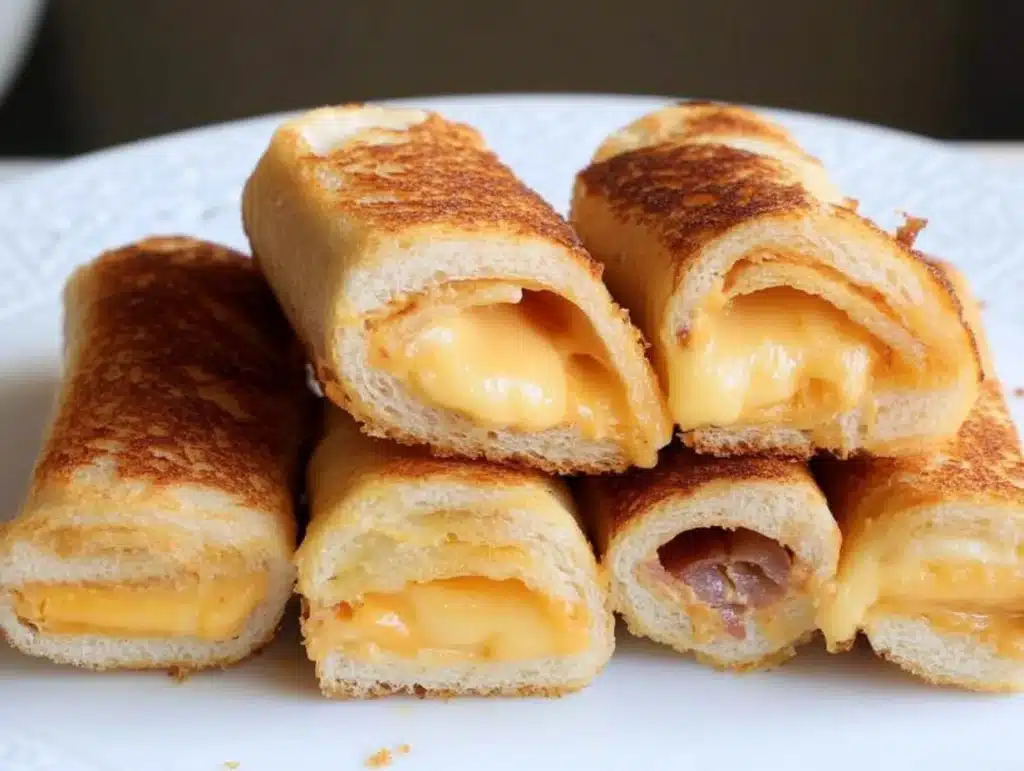
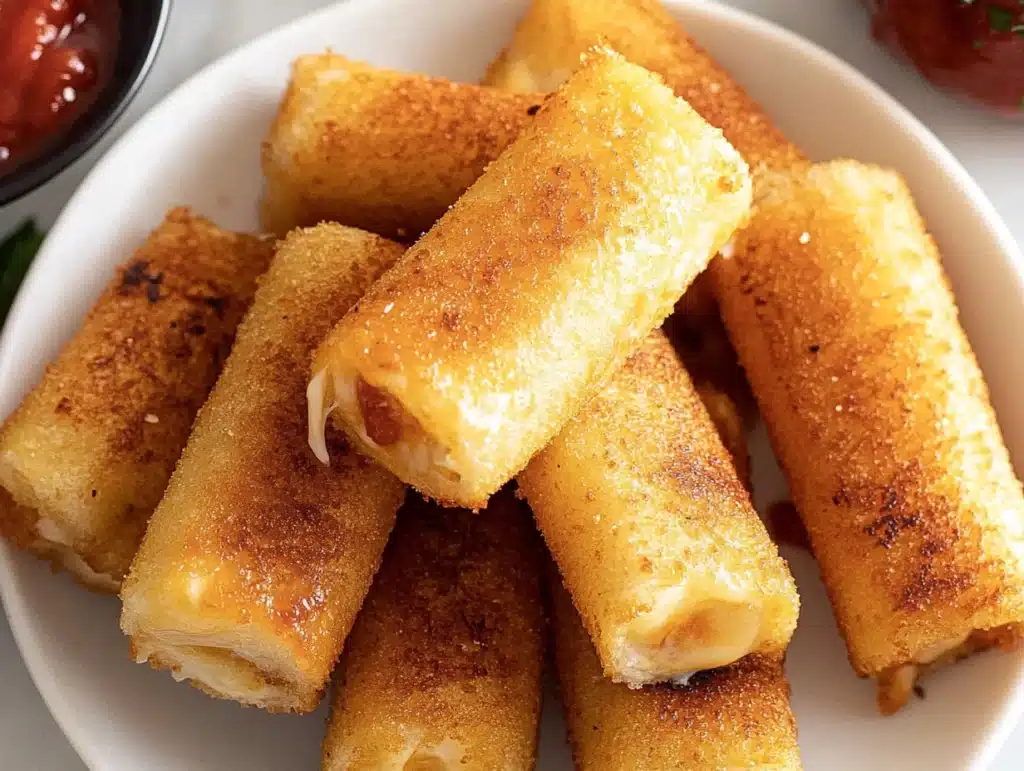
Looking for a quick, cheesy lunch that’s easy to make, fun to eat, and perfect for little hands? These Grilled Cheese Roll Ups are a game-changing take on traditional grilled cheese sandwiches. With crisp, golden exteriors and gooey melted cheese centers, they’re everything kids (and adults!) love — in a fun roll-up form that’s ideal for dipping, snacking, and packing in lunch boxes.
Whether you’re prepping daycare meals, whipping up easy lunches for kids, or creating simple kids meal ideas at home, these cheese roll ups are the answer. They’re mess-free, delicious, and come together in minutes with only a handful of ingredients.
Table of Contents
What Are Grilled Cheese Roll Ups? (A Fun Twist on a Classic Favorite)
Grilled Cheese Roll Ups are exactly what they sound like — bread slices flattened, filled with cheese, rolled tightly, then grilled until golden brown and crispy. Unlike traditional grilled cheese sandwiches, these roll-ups are handheld, dippable, and absolutely perfect for little fingers.
You can think of them as the grilled cheese version of mozzarella sticks — just simpler, faster, and more customizable. They’re great for serving with tomato soup, packing in lunch boxes, or even as a fun party snack.
Why Parents and Kids Love These Cheese Roll Ups
These grilled cheese rolls are:
- Quick and easy – ready in under 15 minutes
- Only 3 ingredients needed – no fancy shopping required
- Totally customizable – add ham, turkey, or veggies
- Perfect for daycare, lunch boxes, or after-school snacks
- Loved by picky eaters – cheesy, familiar, and handheld
They’re the kind of kids lunch box meals that parents love making and kids love eating.
Ingredients for Grilled Cheese Roll Ups (With Exact Quantities)
To make 8 roll-ups, you’ll need:
- 8 slices white sandwich bread (or your favorite soft bread)
- 8 slices American cheese (or cheddar, mozzarella, etc.)
- 2 tablespoons butter, softened
Optional Add-ins:
- Thinly sliced ham or turkey
- Cooked bacon bits
- Tomato slices or spinach
- Light cream cheese spread
Feel free to mix and match fillings — these cheese roll ups are incredibly forgiving and versatile.
Step-by-Step Instructions to Make Grill Cheese Roll Ups
Step 1: Prep the Bread
Use a rolling pin to flatten each slice of bread. Trim crusts if desired for easier rolling (optional).
Step 2: Add the Cheese
Place one slice of cheese on each slice of bread. You can tear or fold the cheese to fit, or use shredded cheese if preferred.
Step 3: Roll and Seal
Roll each slice of bread tightly into a log. Gently press the seam side to help it stay closed.
Step 4: Butter the Outside
Brush or spread butter over the outside of each roll-up.
Step 5: Cook Until Golden
Heat a skillet over medium heat. Place the roll-ups seam side down and cook for 1–2 minutes per side until all sides are golden brown and cheese is melted. Use tongs to rotate and toast evenly.
Step 6: Serve
Let cool slightly, then serve plain or with a side of tomato soup, ketchup, or dipping sauce.
Kitchen Tools You’ll Need for This Recipe
- Rolling pin (or clean bottle)
- Sharp knife (to trim crusts if needed)
- Nonstick skillet or frying pan
- Spatula or tongs
- Pastry brush (for butter)
This minimal-tool recipe is ideal for busy parents, students, and anyone looking for lunch box meals on the fly.
Tips for the Best Grilled Cheese Roll Ups
- Use soft, fresh bread – stale bread won’t roll well
- Butter the outside, not the inside – this ensures a crispy texture
- Cook on medium heat – too hot and they’ll burn before the cheese melts
- Roll tightly – to prevent them from opening while cooking
- Add a second slice of cheese if you want extra gooey centers
These tips make every bite cheesy, crisp, and just right.
Common Mistakes to Avoid When Making Cheese Rolls
- Overstuffing – makes rolling and sealing difficult
- Skipping butter – the bread won’t crisp properly
- Cooking too fast – medium heat gives the best melt and browning
- Using thick or hard bread – soft sandwich bread works best
- Not sealing the edge – roll and press firmly to prevent unrolling
Avoid these mistakes and your grilled cheese rolls will be snack perfection every time.
How to Customize Grilled Cheese Rolls for Different Tastes
Make them your own with these fun variations:
- Add ham or turkey for a protein boost
- Sprinkle herbs or garlic powder on the buttered sides before cooking
- Add a thin spread of mustard or cream cheese for a tangy twist
- Make them spicy with pepper jack cheese or chili flakes
- Use different breads – try whole wheat, brioche, or gluten-free options
This is one of those recipes that easily fits into any kids meal ideas lineup.
Serving Suggestions: Daycare Meals and Lunch Box Ideas
Pack these cheese roll ups in a lunchbox with:
- Carrot sticks or sliced cucumbers
- Apple slices or grapes
- A small container of dipping sauce (like ranch or marinara)
- A sweet treat like a mini cookie or yogurt tube
For daycare or toddler lunches:
- Cut each roll-up in half
- Serve with soft fruit
- Skip any spicy additions or hard crusts
They also make great finger food for birthday parties or playdates!
Perfect Pairings and Kid-Friendly Sides
Turn these grilled cheese roll ups into a full lunch with these side pairings:
- Tomato soup or chicken noodle soup
- Mini veggie skewers or steamed broccoli
- Applesauce or fruit salad
- Crackers and cheese cubes
- Baked sweet potato fries
- Water, juice, or milk
It’s a simple way to round out any easy lunch for kids with balanced options.
How to Store, Pack, and Reheat Grilled Cheese Roll Ups
To Store:
Cool completely and store in an airtight container in the fridge for up to 3 days.
To Reheat:
- Microwave: 20–30 seconds
- Skillet: Re-toast over medium heat for 1–2 minutes
- Air Fryer: 350°F for 2–3 minutes for maximum crispness
To Freeze:
Freeze before cooking — wrap tightly in plastic and freeze for up to 2 months. Thaw overnight and cook as usual.
To Pack for Lunch:
- Let them cool before packing to avoid sogginess
- Use an insulated lunchbox with an ice pack
- Add a paper towel inside to absorb moisture
These reheat beautifully and are one of the easiest kids lunch box meals to prep ahead.
Why These Make the Best Easy Lunches for Kids
- Portable and mess-free – no crumbs, no utensils
- Mild, cheesy flavor – kid-approved every time
- Endless variations – never boring
- Freezer-friendly – perfect for batch cooking
- Minimal ingredients – you probably have everything on hand
Whether your child is heading to preschool or you’re packing for a picky eater, these grilled cheese roll ups are a reliable lunch solution that parents can count on.

FAQs About Grilled Cheese Roll Ups
Can I use shredded cheese?
Yes! Just use about ¼ cup per roll and keep it toward the center to avoid leaking.
Can I make these in the oven or air fryer?
Yes. Bake at 375°F for 10 minutes or air fry at 370°F for 5–6 minutes, flipping halfway.
Are these freezer-friendly?
Yes. Freeze uncooked and cook from frozen or thaw overnight.
What’s the best bread to use?
Soft white sandwich bread works best, but whole wheat and gluten-free options also work well.
Do these work for toddlers?
Yes! Just slice into smaller pieces and cool before serving.
Can I prep these the night before?
Yes, assemble and refrigerate overnight, then cook fresh the next day.
Final Thoughts: A Quick, Cheesy Win for Kids Meal Ideas
These Grilled Cheese Roll Ups are more than just a fun lunch — they’re a time-saving, parent-approved, and totally delicious solution for feeding kids (and grown-ups too). Easy to prep, endlessly customizable, and always devoured, this recipe deserves a spot in every parent’s go-to meal plan.
Love simple, satisfying lunch ideas? Share this recipe, pin it to your meal board, and subscribe to our blog for more fun, fuss-free kids meal ideas that make life easier and tastier!
Print
Grilled Cheese Roll Ups : Fun & Classic
- Total Time: 21
Description
- Looking for a quick, cheesy lunch that’s easy to make, fun to eat, and perfect for little hands? These Grilled Cheese Roll Ups are a game-changing take on traditional grilled cheese sandwiches.
Ingredients
To make 8 roll-ups, you’ll need:
- 8 slices white sandwich bread (or your favorite soft bread)
- 8 slices American cheese (or cheddar, mozzarella, etc.)
- 2 tablespoons butter, softened
Optional Add-ins:
- Thinly sliced ham or turkey
- Cooked bacon bits
- Tomato slices or spinach
- Light cream cheese spread
Instructions
Step 1: Prep the Bread
Use a rolling pin to flatten each slice of bread. Trim crusts if desired for easier rolling (optional).
Step 2: Add the Cheese
Place one slice of cheese on each slice of bread. You can tear or fold the cheese to fit, or use shredded cheese if preferred.
Step 3: Roll and Seal
Roll each slice of bread tightly into a log. Gently press the seam side to help it stay closed.
Step 4: Butter the Outside
Brush or spread butter over the outside of each roll-up.
Step 5: Cook Until Golden
Heat a skillet over medium heat. Place the roll-ups seam side down and cook for 1–2 minutes per side until all sides are golden brown and cheese is melted. Use tongs to rotate and toast evenly.
Step 6: Serve
Let cool slightly, then serve plain or with a side of tomato soup, ketchup, or dipping sauce.
Notes
- Use soft, fresh bread – stale bread won’t roll well
- Butter the outside, not the inside – this ensures a crispy texture
- Cook on medium heat – too hot and they’ll burn before the cheese melts
- Roll tightly – to prevent them from opening while cooking
- Prep Time: 8
- Cook Time: 13
- Category: appetizer
- Cuisine: American
Nutrition
- Serving Size: 8 roll-ups
- Calories: 190
- Fat: 5g
- Carbohydrates: 10g
- Protein: 2g
Keywords: Grilled Cheese Roll Ups