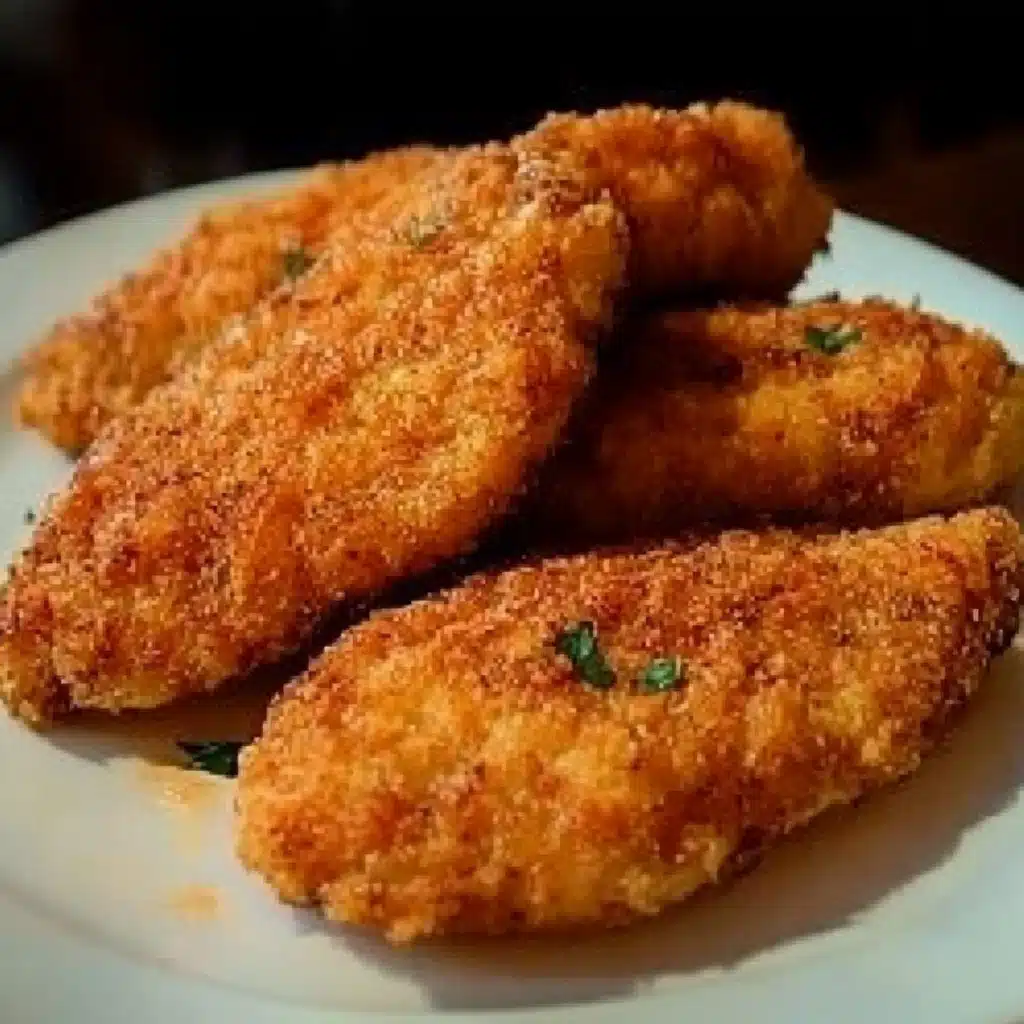
When it comes to quick, satisfying, and healthy weeknight meals, Crispy Homemade Baked Chicken Tenders are a standout. Whether you’re craving a healthier alternative to deep-fried chicken or simply want a meal that’s both delicious and easy to prepare, this recipe is the perfect solution. By baking the chicken tenders instead of frying them, you get that perfect crispy texture while keeping the meal lighter and healthier.
This recipe for crispy homemade baked chicken tenders is quick, simple, and customizable to your taste. With just a few basic ingredients, you can have a meal that’s perfect for busy nights, picky eaters, or anyone looking for a healthier dinner option without sacrificing flavor or crunch.
Looking for more easy dinner ideas? Check out our Healthy Dinner Recipes for more delicious and quick options!
Table of Contents

What Makes Crispy Baked Chicken Tenders So Special?
There’s no shortage of reasons why Crispy Baked Chicken Tenders are a family favorite:
- Healthier Alternative: By baking instead of frying, you reduce the amount of oil and fat, making this recipe a much healthier option than traditional fried chicken tenders.
- Crispy Texture Without Frying: The key to achieving the crispy exterior without frying is the combination of a well-seasoned coating and a hot oven. The result? Perfectly crispy chicken tenders that are juicy on the inside.
- Quick and Easy: This recipe is incredibly simple and requires minimal ingredients, making it an ideal choice for busy weeknights. You can prepare these chicken tenders in under 30 minutes.
- Perfect for Meal Prep: These crispy homemade chicken tenders are great for meal prep. They reheat well, making them an excellent choice for leftovers or a quick lunch during the week.
- Kid-Friendly: These chicken tenders are a hit with kids, offering a fun and crunchy dinner that’s easy to eat with their hands.
Whether you’re making them for dinner or as a snack, crispy baked chicken tenders are versatile and satisfying. They’re also great as a main dish, a sandwich filling, or paired with your favorite dipping sauces.
Ingredients for Crispy Homemade Baked Chicken Tenders
This crispy baked chicken tenders recipe uses just a handful of ingredients to make the tenderloins crisp, golden, and perfectly seasoned. Here’s what you’ll need:
For the Chicken Tenders:
- 1 lb chicken tenderloins (or chicken breast cut into strips)
- 1/2 cup all-purpose flour
- 1/2 teaspoon salt
- 1/4 teaspoon black pepper
- 1 teaspoon garlic powder
- 1 teaspoon onion powder
- 1/2 teaspoon paprika (optional, for a smoky flavor)
- 1 cup panko breadcrumbs (for extra crunch)
- 1/2 cup grated parmesan cheese (optional, for added flavor)
- 1 large egg
- 2 tablespoons olive oil (or cooking spray)
For Dipping Sauce (optional):
- Ranch dressing, honey mustard, or your favorite dipping sauce
These ingredients come together to form a crispy, golden coating that enhances the flavor of the chicken tenderloins, creating a perfectly crispy texture without the need for frying.
Step-by-Step Guide to Making Crispy Homemade Baked Chicken Tenders
Making crispy baked chicken tenders is easy and doesn’t require much time. Here’s how to prepare this simple and satisfying meal:
Step 1: Preheat the Oven and Prepare the Baking Sheet
Preheat your oven to 400°F (200°C). Line a baking sheet with parchment paper or lightly grease it with cooking spray to prevent the chicken tenders from sticking.
Step 2: Prepare the Coating
In a shallow bowl, whisk together flour, salt, pepper, garlic powder, onion powder, and paprika. In another shallow bowl, whisk the egg. In a third shallow bowl, combine the panko breadcrumbs and parmesan cheese (if using).
Step 3: Coat the Chicken Tenderloins
Dip each chicken tenderloin into the flour mixture, coating it evenly. Then dip it into the beaten egg, letting any excess egg drip off, and finally coat it in the panko breadcrumb mixture, pressing gently to ensure the crumbs stick.
Step 4: Arrange the Chicken on the Baking Sheet
Place the coated chicken tenders onto the prepared baking sheet, spacing them out evenly. Drizzle the tops of the tenders with a little olive oil or spray them lightly with cooking spray to help them get golden and crispy as they bake.
Step 5: Bake the Chicken Tenders
Bake the chicken tenders in the preheated oven for 15-20 minutes, flipping halfway through, until the tenders are golden brown and crispy. The internal temperature of the chicken should reach 165°F (75°C) when tested with a meat thermometer.
Step 6: Serve and Enjoy
Remove the chicken tenders from the oven and serve them immediately with your favorite dipping sauce, such as ranch dressing or honey mustard. Enjoy the crispy, flavorful chicken tenders!
How to Get Perfectly Crispy Chicken Tenders Without Frying
The secret to getting crispy baked chicken tenders without frying lies in the coating and the oven temperature:
- Use panko breadcrumbs: Panko breadcrumbs provide a lighter, airier coating compared to traditional breadcrumbs, giving the tenders a crispier texture.
- Add parmesan: For an even crispier crust and added flavor, mix parmesan cheese with the breadcrumbs. The cheese helps to create a golden, crunchy finish.
- Spray with oil: Lightly spray the chicken tenders with olive oil or another oil of your choice before baking. This helps them crisp up in the oven, mimicking the effect of frying.
- High oven temperature: Baking the chicken tenders at 400°F (200°C) ensures they cook quickly and evenly, resulting in a crispy, golden-brown crust without drying out the chicken.
Tips for Making the Best Crispy Baked Chicken Tenders
- Use chicken tenderloins or thinly sliced chicken breast: For the best results, use chicken tenderloins, which are naturally tender and cook quickly. If using chicken breast, cut it into strips of even thickness to ensure uniform cooking.
- Don’t overcrowd the pan: Make sure the chicken tenders are spaced out on the baking sheet to allow air to circulate around them and create a crispy coating.
- Flip halfway: Flip the chicken tenders halfway through baking to ensure they cook evenly and get crispy on both sides.
- Season the breadcrumbs: Don’t forget to season the panko breadcrumbs with salt, pepper, and other seasonings for added flavor.
How to Serve Crispy Baked Chicken Tenders
These crispy homemade chicken tenders are incredibly versatile. Here are some ideas for how to serve them:
- With dipping sauces: Serve your chicken tenders with your favorite dipping sauces, such as ranch, ketchup, honey mustard, or barbecue sauce.
- In a wrap: Use the chicken tenders in a wrap with fresh veggies, lettuce, and a drizzle of dressing or sauce for a delicious handheld meal.
- On a salad: Add crispy chicken tenders on top of a green salad with your favorite dressing for a quick and healthy meal.
- With sides: Pair the chicken tenders with classic sides like fries, sweet potato fries, or mac and cheese for a more indulgent meal.
How to Store and Reheat Leftover Chicken Tenders
Storage:
Store any leftover crispy baked chicken tenders in an airtight container in the refrigerator for up to 3 days.
Reheating:
To keep the tenders crispy, reheat them in the oven at 375°F (190°C) for 5-7 minutes, or until they’re heated through. You can also microwave them, but they may lose some of their crispiness. If reheating in the microwave, place a paper towel under the chicken tenders to absorb any excess moisture.
Why Crispy Homemade Baked Chicken Tenders Are Perfect for Busy Weeknights
Crispy Homemade Baked Chicken Tenders are the ultimate weeknight dinner for a few reasons:
- Quick and easy: This recipe comes together in just 30 minutes, making it perfect for busy families or individuals who need a quick, satisfying meal.
- Minimal prep: With just a few ingredients, these tenders are easy to prepare and don’t require marinating or complicated steps.
- Customizable: You can add your favorite spices or toppings to make this dish your own. Whether you want spicy tenders with cayenne pepper or a cheesy crust with extra parmesan, the options are endless.
Common Mistakes to Avoid When Making Crispy Baked Chicken Tenders
- Not using panko breadcrumbs: Regular breadcrumbs don’t give the same crispy texture that panko does. Stick to panko breadcrumbs for that golden, crispy finish.
- Overcrowding the pan: If you place the chicken tenders too close together, they won’t get crispy. Ensure there’s enough space for each piece to cook evenly.
- Not flipping halfway: To ensure both sides are crispy, don’t forget to flip the tenders halfway through the cooking process.
- Underseasoning: The breading is key to flavor, so don’t forget to season your breadcrumbs and flour mixture generously.

Frequently Asked Questions About Crispy Baked Chicken Tenders
Can I use chicken breasts instead of tenderloins?
Yes, you can use chicken breasts, but make sure to cut them into thin strips to ensure they cook evenly.
Can I make these tenders ahead of time?
Yes, you can bread and prepare the chicken tenders ahead of time and refrigerate them. When ready to cook, simply bake them as directed.
Can I freeze crispy baked chicken tenders?
Yes, you can freeze the breaded tenders before baking. Place them on a baking sheet in a single layer and freeze for 1-2 hours, then transfer them to a freezer bag. When ready to cook, bake from frozen at 400°F (200°C) for 20-25 minutes.
Conclusion + Call to Action
Crispy Homemade Baked Chicken Tenders are a healthier, easy-to-make alternative to fried chicken, offering a satisfying crunch without all the extra grease. They’re perfect for weeknight dinners, meal prep, and even snacks. This recipe is simple, flavorful, and sure to become a family favorite!
If you loved this recipe, share it, save it for later, and subscribe to our blog for more healthy chicken tender recipes, easy weeknight dinners, and other delicious meals!
Print
Crispy Homemade Baked Chicken Tenders : A Must-Try Healthy and Easy Dinner
- Total Time: 35 minutes
- Yield: 4 servings
Description
These Crispy Homemade Baked Chicken Tenders are an easy, healthy, and delicious dinner option. Juicy chicken tenderloins are coated in a seasoned breadcrumb mixture and baked to golden perfection. A fun, kid-friendly recipe that’s perfect for busy weeknights!
Ingredients
For the Chicken Tenders: 1 lb chicken tenderloins (about 6-8 pieces) 1 cup Panko breadcrumbs 1/4 cup grated Parmesan cheese (optional) 1/2 teaspoon garlic powder 1/2 teaspoon onion powder 1/2 teaspoon paprika Salt and pepper, to taste 2 large eggs, beaten 1/4 cup all-purpose flour For the Dipping Sauce (Optional): 1/2 cup ketchup 2 tablespoons honey mustard (or sauce of choice)
Instructions
1. Preheat oven to 400°F (200°C). Line a baking sheet with parchment paper and lightly spray with cooking spray. 2. Set up dredging station: flour in one shallow bowl, beaten eggs in another, and breadcrumbs mixed with Parmesan, garlic powder, onion powder, paprika, salt, and pepper in a third. 3. Coat each chicken tender in flour, then dip in egg, then press into breadcrumb mixture to coat evenly. 4. Arrange coated tenders on baking sheet, leaving space between each. Lightly spray tops with cooking spray. 5. Bake 15–20 minutes, flipping halfway through, until golden and internal temperature reaches 165°F (74°C). 6. Cool slightly and serve with your favorite dipping sauce.
Notes
• Use Panko for extra crunch. • Do not overcrowd the baking sheet to keep tenders crispy. • Flip halfway for even baking. • Season breadcrumbs to your liking—try Italian seasoning or cayenne for a kick. • Use gluten-free breadcrumbs if needed.
- Prep Time: 15 minutes
- Cook Time: 20 minutes
- Category: Main
- Method: Baked
- Cuisine: American
Nutrition
- Serving Size: 2 tenders
- Calories: 220
- Sugar: 2g
- Sodium: 350mg
- Fat: 6g
- Saturated Fat: 2g
- Unsaturated Fat: 3g
- Trans Fat: 0g
- Carbohydrates: 15g
- Fiber: 1g
- Protein: 25g
- Cholesterol: 110mg
Keywords: Baked Chicken Tenders, Crispy Chicken Strips, Chicken Tenderloin Recipes, Healthy Chicken Tenders, Easy Chicken Dinner