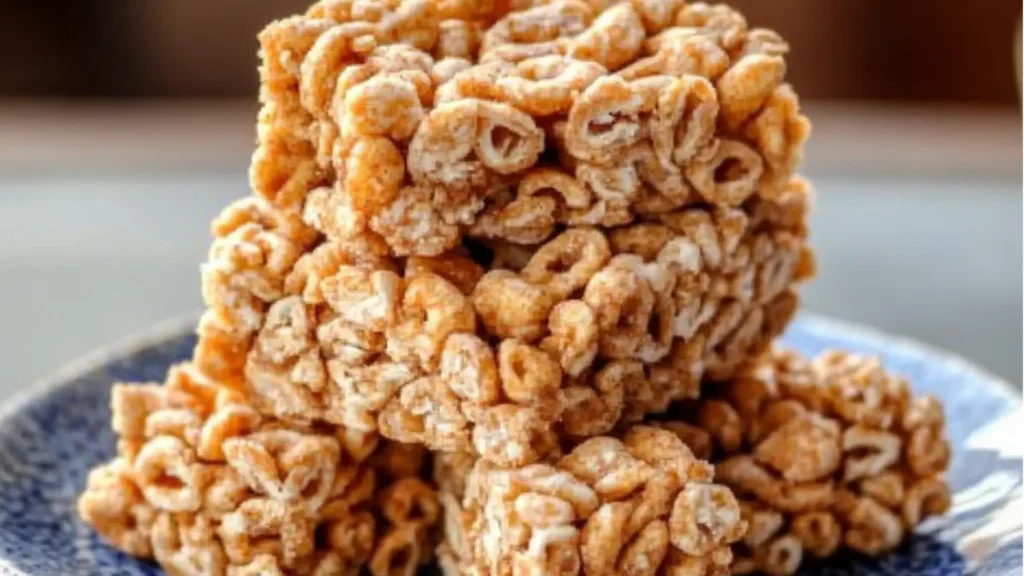
If you’re searching for an easy, nutritious, and kid-friendly breakfast that you can grab on the run, these Healthy Breakfast Cereal Bars are exactly what you need. Quick to make, requiring just a few ingredients, and packed with wholesome goodness, they’re the ideal option for everything from hectic weekday mornings to satisfying after-school snack cravings.
Perfect for easy kid-friendly breakfast recipes or even as a portable treat for busy parents, these bars blend the sweet crunch of cereal with the creamy richness of nut butter and the natural sweetness of honey or maple syrup. And if you love prepping ahead for the week, this is the ultimate breakfast meal prep solution you’ll keep coming back to.
Table of Contents
What Makes These Breakfast Bars Truly Healthy and Kid-Friendly?
Unlike many store-bought options packed with refined sugar and unpronounceable preservatives, these cereal bars are made with real ingredients you likely already have in your pantry. Think simple whole grain cereals, natural nut or seed butters, and just the right amount of sweetness from natural sources like honey or maple syrup. They’re rich in fiber, filled with healthy fats, and offer a dose of protein to keep you or your little ones full and focused.
Even better, the bars are no-bake, which means no oven required and minimal mess in the kitchen. You can even get the kids involved in making them—just like with our cheesy mashed potato puffs or snake charmer pretzels, these are as fun to prepare as they are to eat.
Ingredients You’ll Need for Healthy Breakfast Cereal Bars
To make these bars, you’ll only need a short list of pantry staples:
- 2 cups whole grain cereal (such as rice cereal, oat squares, or bran flakes)
- 1/2 cup nut or seed butter (peanut butter, almond butter, or sunflower seed butter)
- 1/3 cup honey or maple syrup
- Optional add-ins: mini chocolate chips, dried cranberries, raisins, shredded coconut, chia seeds, or crushed nuts
You can also get creative with the base. Try using mini pancake cereal for a fun twist or blend in crushed banana zucchini muffins for added texture and flavor.
Kitchen Tools for Easy Homemade Snack Prep
One of the best things about this recipe is how little equipment it requires. Here’s all you need:
- A mixing bowl
- A small saucepan or microwave-safe bowl
- A spatula or spoon
- Measuring cups
- An 8×8 or 9×9 inch baking dish lined with parchment paper
- A fridge or freezer for chilling the bars
That’s it—no mixer, no oven, no hassle. These bars are a dream for those who want homemade snacks without the typical baking mess.
Step-by-Step: How to Make Healthy Cereal Bars at Home
Start by heating your honey (or maple syrup) and nut butter in a saucepan over low heat. Stir constantly until smooth and warm, but do not let it boil. This step helps everything bind together.
Next, pour your cereal and any optional mix-ins into a large mixing bowl. Drizzle the warm nut butter mixture over the cereal and stir thoroughly until every piece is coated.
Transfer the mixture to a parchment-lined baking pan. Use a spatula to press it down firmly and evenly into the pan. You want the bars to be compact so they hold together well once sliced.
Refrigerate the mixture for at least one hour or freeze for 20–30 minutes if you’re short on time. Once firm, remove from the pan, slice into bars, and enjoy.
Looking for something indulgent to serve with these bars? Try our pumpkin cheesecake truffles for a healthy-meets-decadent sweet treat.
Breakfast Meal Prep Benefits: Save Time and Stress
These cereal bars are the perfect meal prep recipe. One batch makes enough bars to cover breakfast or snacks for the entire week. Whether you’re prepping school lunches or packing a workday snack stash, this recipe helps you eat better with less effort.
They pair wonderfully with make-ahead breakfast bowls, tater tot breakfast bowls, or even overnight oats for a variety of grab-and-go morning options.
Make It Your Own: Easy Swaps and Add-Ins
This recipe is as flexible as it is delicious. Try some of these variations:
For nut-free: Swap peanut or almond butter with sunflower seed butter.
For vegan: Use maple syrup instead of honey and dairy-free chocolate chips.
For high protein: Stir in a scoop of your favorite protein powder or crushed pumpkin protein muffins.
For a chocolate version: Add cocoa powder to the mix or top with melted dark chocolate.
For more fiber: Mix in flaxseeds or hemp hearts.
Feel free to experiment until you find your family’s favorite combination.
Serving Suggestions: Breakfast for Kids and Grownups Alike
These bars work well in a wide range of settings. Serve them as:
- A standalone breakfast bar
- A snack paired with fruit or yogurt
- A healthy lunchbox addition
- A gym or post-workout energy boost
If you’re making breakfast for kids, pair these with strawberry protein pancakes or cinnamon roll breakfast bake for an extra fun and balanced morning.
How to Pack and Store for On-the-Go or School Lunches
Once the bars are chilled and cut, wrap each one in parchment or wax paper for easy grab-and-go storage. Keep them in an airtight container in the fridge for up to one week. For longer storage, freeze the bars for up to three months—just defrost overnight in the fridge.
They’re perfect for slipping into lunchboxes alongside apple nachos or pairing with a cucumber dill salad for a fresh, balanced midday meal.
Perfect for Healthy Sweets or After-school Snack Ideas
These cereal bars aren’t just a smart breakfast option—they also satisfy those mid-afternoon sugar cravings without sending you into a crash. That’s why they’re perfect as healthy sweets and easy after-school snack ideas that kids will actually look forward to.
For another kid-favorite snack that’s fun to make and eat, try our freezer breakfast sandwiches or cheddar bay biscuits.
Breakfast Cereal Bars vs Store-Bought Granola Bars: What’s the Difference?
Store-bought bars might be convenient, but they often come with added sugars, preservatives, and filler ingredients that you can easily avoid by making your own.
When you prepare your own breakfast cereal bars, you get:
- Better flavor
- Better texture
- Better nutrition
- Total control over what goes in
You also save money over time and reduce packaging waste—a win for your wallet and the planet.
Allergy-Friendly & Vegan Options for Homemade Snacks
If you’re working around allergies or dietary preferences, this recipe is easy to adapt.
Dairy-free? Use plant-based chocolate chips or skip them altogether.
Nut-free? Sunflower seed or soy butter works beautifully.
Gluten-free? Choose certified gluten-free cereals or oats.
Vegan? Use maple syrup instead of honey and dairy-free chocolate.
This flexibility makes them one of the most versatile homemade snacks you can keep in rotation.
Common Mistakes to Avoid When Making Breakfast Bars
Pressing the mixture too lightly: This can make your bars fall apart. Be firm when pressing them into the pan.
Overheating the honey and nut butter: It can burn easily or harden once cooled. Low and slow is best.
Not letting them chill long enough: The bars need time to set. Be patient for perfect texture.
Using too little cereal: Stick to the ratios to avoid gooey or overly sticky bars.
Getting these simple steps right ensures perfect bars every single time.
FAQs: Everything You Need to Know About Cereal Bars
Can I make these bars with oatmeal instead of cereal?
Yes! Quick oats or puffed rice cereal work well. You can also try crushed apple fritter donuts for a special treat version.
How long do they last?
Up to one week in the fridge or three months in the freezer.
Are these good for toddlers?
Yes, just make sure mix-ins like nuts are finely chopped or omitted.
Can I make a double batch?
Definitely! Use a 9×13 inch pan and adjust chill time as needed.
Can I skip the sweetener?
You can reduce it, but some sweetener helps the bars hold together and adds flavor.
Final Thoughts + Call to Action: Share, Save, and Subscribe
These Healthy Breakfast Cereal Bars are a fantastic way to start your day, fuel up between meals, or treat your kids to something nourishing and sweet. With minimal prep, tons of flexibility, and big flavor, this recipe is one you’ll return to again and again.
Love this recipe? Share it with friends, save it to your meal prep list, and subscribe to the blog for more easy kid-friendly breakfast recipes, homemade snacks, and healthy sweets your whole family will love.
Don’t miss more smart and satisfying recipes from Lyndy’s Kitchen, including:
Pumpkin oatmeal cookies
Cucumber shrimp salad
Crescent roll mummy hot dogs
Healthy Breakfast Cereal Bars : The Perfect On-the-Go Breakfast and Snack
- Total Time: 10 minutes + chilling time
- Yield: 8–12 bars 1x
Description
Healthy Breakfast Cereal Bars are an easy, no-bake, kid-friendly breakfast or snack made with whole grain cereal, nut butter, and natural sweeteners. They’re wholesome, crunchy, lightly sweet, and perfect for grab-and-go mornings, lunchboxes, or after-school snacks.
Ingredients
- 2 cups whole grain cereal (rice cereal, oat squares, bran flakes, etc.)
- 1/2 cup nut or seed butter (peanut, almond, or sunflower seed butter)
- 1/3 cup honey or maple syrup
- Optional add-ins: mini chocolate chips, dried cranberries, raisins, shredded coconut, chia seeds, crushed nuts
Instructions
- Warm the Sweetener & Nut Butter: In a saucepan over low heat, gently warm honey (or maple syrup) with nut butter, stirring until smooth. Do not boil.
- Mix with Cereal: Add cereal and desired mix-ins to a large bowl. Pour warm mixture over top and stir until fully coated.
- Press into Pan: Transfer mixture to a parchment-lined 8×8 or 9×9 dish. Press very firmly with a spatula so the bars hold together.
- Chill: Refrigerate at least 1 hour or freeze 20–30 minutes until firm.
- Slice & Serve: Remove from pan, slice into bars, and enjoy.
Notes
- Press firmly into the pan—this prevents crumbly bars.
- Warm nut butter mixture gently to avoid burning or hardening.
- Chill long enough for clean slicing.
- Add protein powder, flaxseed, or chia for extra nutrition.
- Store in the fridge up to 1 week or freeze up to 3 months.
- Prep Time: 10 minutes
- Cook Time: 0 minutes
- Category: Breakfast, Snack
- Method: No-Bake
- Cuisine: American
Nutrition
- Serving Size: 1 bar
- Calories: 180
- Sugar: 11g
- Sodium: 85mg
- Fat: 8g
- Saturated Fat: 1.5g
- Unsaturated Fat: 5g
- Trans Fat: 0g
- Carbohydrates: 24g
- Fiber: 2g
- Protein: 4g
- Cholesterol: 0mg
Keywords: Healthy Breakfast Bars, No Bake Cereal Bars, Kid Friendly Breakfast, Easy Snack Bars, Meal Prep Breakfast Bars