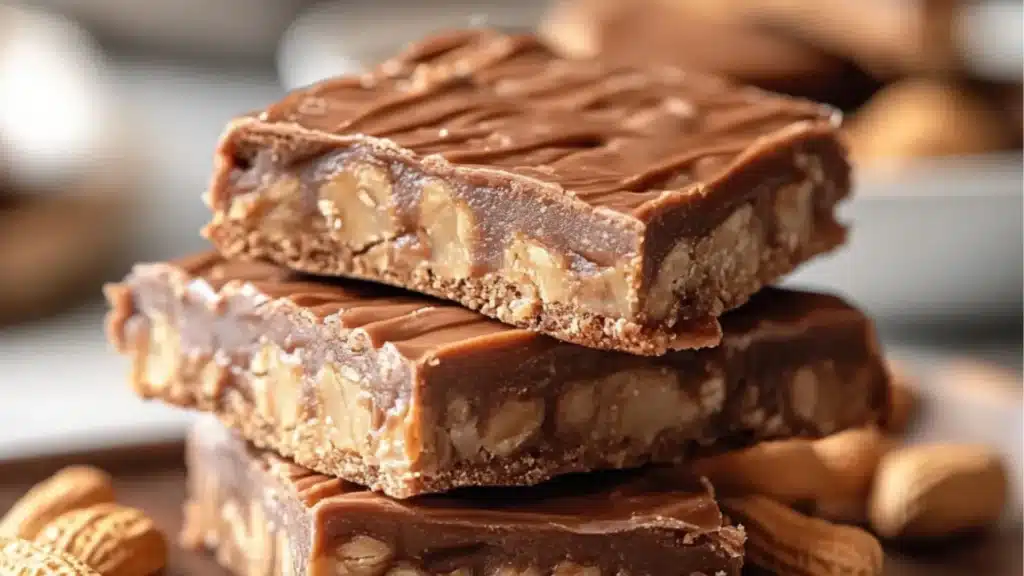
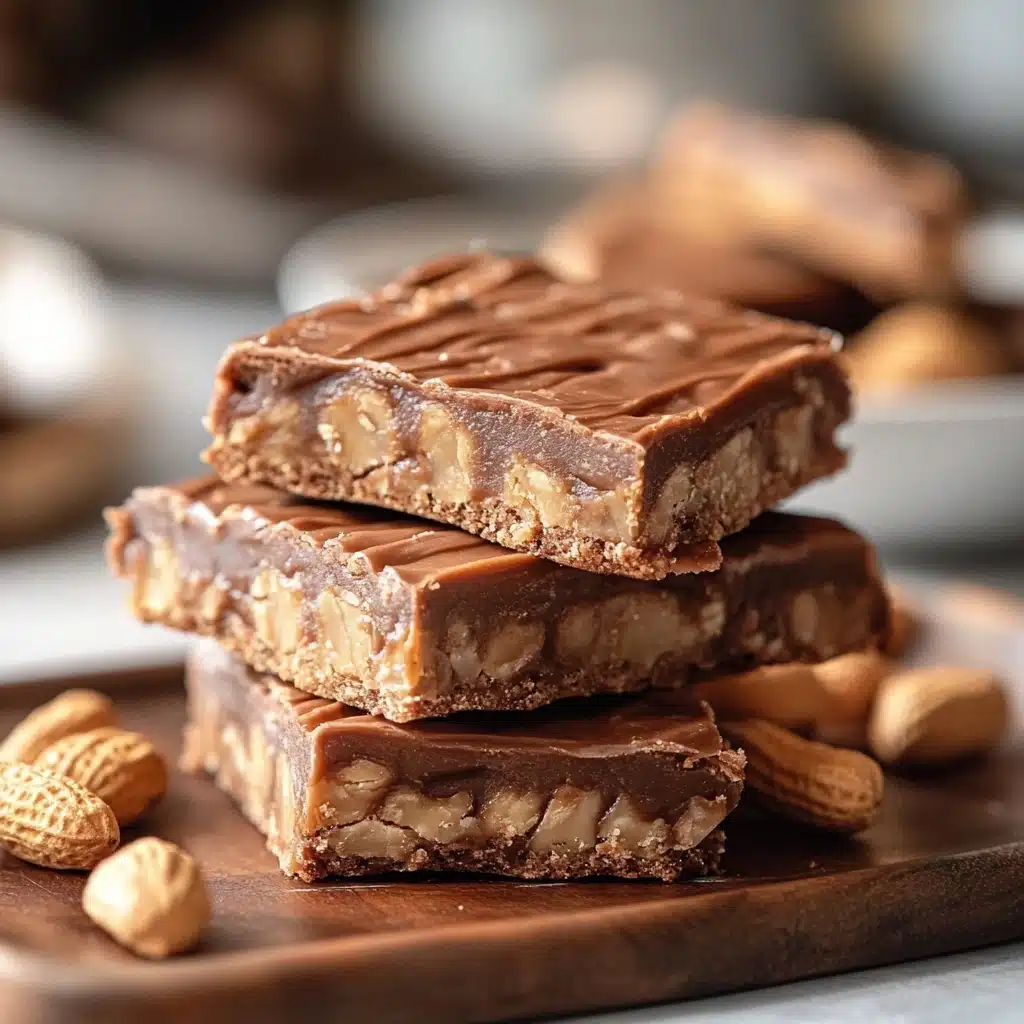
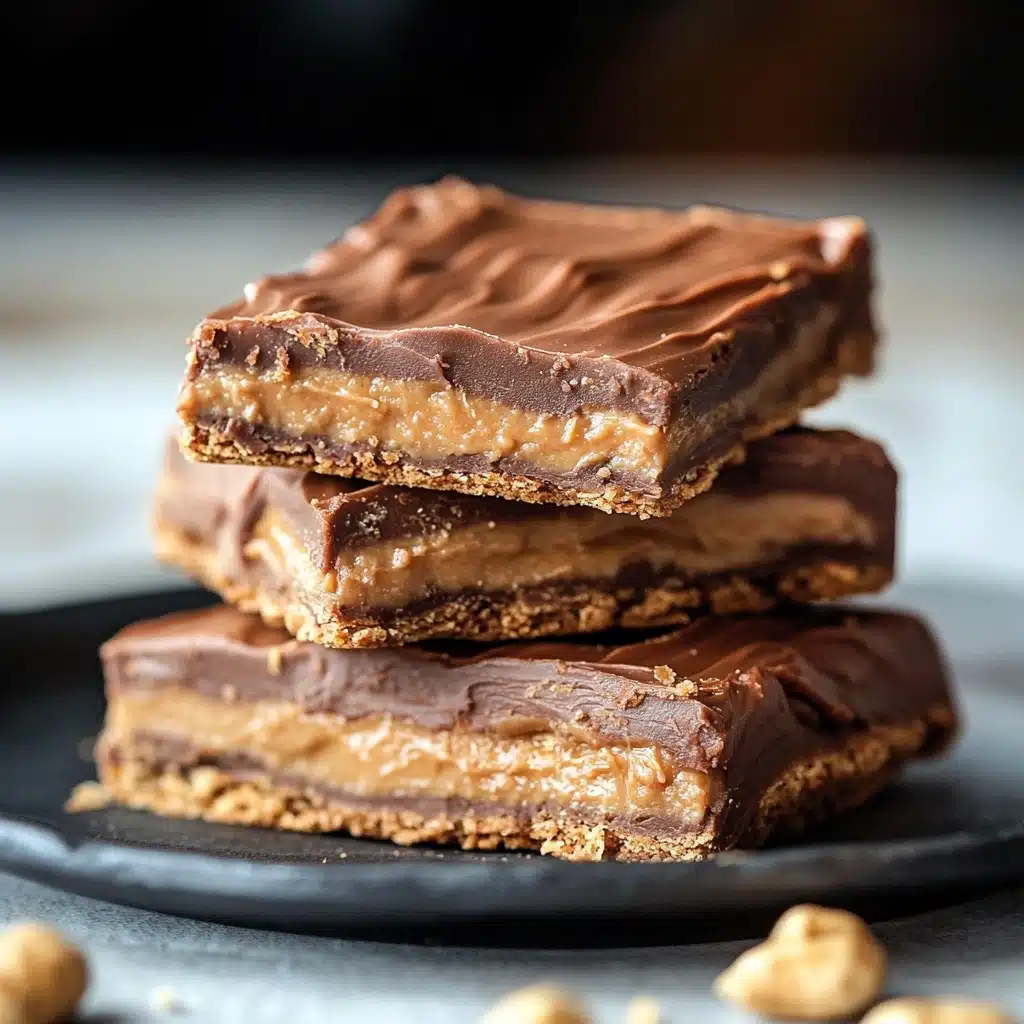
Craving a sweet, nostalgic bite of Disneyland magic? These Disneyland’s Peanut Butter Sandwich Bars are the dreamy treat you’ve been looking for. Inspired by the iconic snack once served at the Disneyland bakeries, these no-bake bars feature a rich, creamy peanut butter filling nestled between layers of graham crackers and coated with a smooth chocolate topping.
This recipe brings all the joy of your favorite theme park right into your kitchen—and you don’t need a plane ticket or a mouse-shaped hat to enjoy it. Just a few pantry staples and a little chill time, and you’ll have a dessert that rivals the real thing.
Perfect for parties, lunchbox surprises, or simply satisfying that peanut butter-chocolate craving, these peanut butter bars with graham crackers are as easy as they are delicious.
Table of Contents

What Are Disneyland Peanut Butter Bars? A Legendary Park Favorite
Disneyland peanut butter sandwich bars were once a beloved treat found at various sweet spots across the park—most notably at Pooh Corner in Critter Country. While they’re no longer officially on the menu, fans haven’t forgotten the dreamy combo of graham crackers, peanut butter filling, and rich chocolate coating.
They’re basically:
- A chocolate and peanut butter dessert with graham cracker crunch
- A no-bake, quick-assembly bar that chills instead of bakes
- A Disney peanut butter square copycat you can make at home
These bars are a fusion of a peanut butter cup and a cookie sandwich, with the added bonus of minimal effort and maximum joy.
Ingredients for Peanut Butter Sandwich Bars (With Exact Measurements)
This recipe yields about 12–16 bars depending on your pan size and how you cut them.
Base and filling:
- 1 sleeve graham crackers (approx. 9 whole crackers), plus extra for layering
- 1 cup creamy peanut butter
- ½ cup unsalted butter, melted
- 1½ cups powdered sugar
- 1 teaspoon vanilla extract
- ¼ teaspoon salt
Chocolate topping:
- 1½ cups semi-sweet chocolate chips
- 2 tablespoons peanut butter (to help the chocolate set soft)
These ingredients come together into a layered masterpiece of sweet, salty, creamy, and crunchy textures.
Tools and Equipment You’ll Need for These No-Bake Bars
You don’t need anything fancy—just basic kitchen tools:
- 8×8 or 9×9-inch square baking pan
- Parchment paper or foil
- Microwave-safe bowl or double boiler
- Mixing bowl and spatula
- Measuring cups and spoons
- Offset spatula or butter knife (for spreading layers)
- Sharp knife (for slicing bars cleanly)
Minimal tools, no oven—this is the perfect peanut butter dessert easy enough for even beginner bakers.
Step-by-Step Instructions: How to Make Disneyland Peanut Butter Sandwich Bars
Step 1: Prep the pan
Line an 8×8 or 9×9-inch baking pan with parchment paper, leaving some overhang for easy lifting.
Step 2: Create the bottom graham cracker layer
Lay whole graham crackers in a single layer across the bottom of the pan. Break crackers if needed to cover the full base.
Step 3: Make the peanut butter filling
In a medium bowl, mix melted butter, peanut butter, powdered sugar, vanilla, and salt until smooth. The mixture should be thick and creamy.
Step 4: Spread the filling
Pour the peanut butter mixture over the graham crackers and spread evenly with a spatula.
Step 5: Add the top layer of graham crackers
Place another layer of whole graham crackers on top of the peanut butter filling, gently pressing down to secure them.
Step 6: Melt and pour the chocolate topping
In a microwave-safe bowl, melt chocolate chips and 2 tablespoons peanut butter together in 30-second intervals, stirring until smooth. Pour over the top graham layer and spread evenly.
Step 7: Chill until set
Refrigerate for at least 1–2 hours, or until the chocolate is firm and the bars are set.
Step 8: Slice and serve
Use the parchment paper to lift the bars out of the pan. Slice into squares or rectangles with a sharp knife. Serve chilled or at room temperature.
Now you’ve got a batch of authentic-tasting graham cracker sandwich cookies with that classic Disney dessert flair!
Secrets to Getting the Perfect Texture and Flavor
- Use creamy peanut butter for a smooth filling. Natural peanut butter is okay but may require extra chilling due to its thinner consistency.
- Sift the powdered sugar before mixing for a lump-free filling.
- Add a little salt to the filling—it elevates the sweetness and balances the chocolate.
- Chill thoroughly before slicing for cleaner edges and less mess.
- Use parchment paper to make removing and cutting the bars easier.
These tips guarantee that your copycat dessert recipe is picture-perfect and truly crave-worthy.
Fun Variations: Peanut Butter Pie Bars, Crunchy vs. Creamy, and More
Want to mix things up? Try one of these easy variations:
Peanut Butter Pie Bars
Swap the graham crackers for a crushed graham crust. Press it into the pan before adding the peanut butter layer. This gives a softer base with pie-like vibes.
Crunchy version
Use crunchy peanut butter or stir in chopped peanuts into the filling for extra texture.
White chocolate topping
Use white chocolate chips instead of semi-sweet for a totally different (but equally dreamy) finish.
S’mores twist
Add a thin layer of marshmallow fluff on top of the peanut butter layer before topping with chocolate.
Healthier version
Use natural peanut butter, reduce the sugar slightly, and opt for dark chocolate chips.
Whether you keep it classic or get creative, these bars are flexible enough to suit any dessert mood.
Serving Suggestions for Chocolate and Peanut Butter Desserts
These bars are rich and satisfying, so a little goes a long way. Here are some ways to serve them:
- Cut into small squares for dessert platters or snack boards
- Pair with a glass of cold milk for the ultimate nostalgic treat
- Serve with a scoop of vanilla or peanut butter ice cream
- Drizzle with caramel or dust with powdered sugar for a bakery-style finish
These chocolate peanut butter desserts are an easy win for bake sales, potlucks, or just curling up on the couch.
How to Store and Freeze Peanut Butter Sandwich Bars
Refrigerate
Store bars in an airtight container in the fridge for up to 1 week. Place parchment between layers to prevent sticking.
Freeze
Place sliced bars in a freezer-safe container with parchment between layers. Freeze for up to 2 months. Thaw in the fridge or at room temperature.
Tip: These bars are excellent cold, so they’re often best served straight from the fridge.
Perfect for make-ahead dessert prep and holiday batches.
Make-Ahead Tips and Party Prep Ideas
Planning a party or busy week? These bars are ideal make-ahead treats:
- Make the day before and refrigerate overnight for optimal slicing.
- Double the recipe and use a 9×13-inch pan for a crowd.
- Individually wrap bars for a grab-and-go snack or lunchbox treat.
- Serve with coffee or cocoa for a themed dessert bar or party station.
They’re a standout addition to any dessert table and always a conversation starter.
Nutrition Facts (Per Serving)
Here’s an approximate breakdown for one square (based on 16 servings):
Calories: 280
Fat: 19 g
Saturated Fat: 8 g
Carbohydrates: 23 g
Sugar: 17 g
Protein: 5 g
Sodium: 140 mg
Fiber: 2 g
Calcium: 2% DV
Iron: 4% DV
To reduce sugar, use less powdered sugar in the filling or swap for a natural sweetener like powdered monk fruit.
Disneyland’s Peanut Butter Sandwich Bars FAQs
Can I make these nut-free?
Yes! Use sunflower seed butter in place of peanut butter and be sure your graham crackers and chocolate are allergy-safe.
Do I have to use graham crackers?
You can substitute with digestive biscuits or vanilla wafers, or create a graham cracker crumb crust.
Can I use natural peanut butter?
Yes, but the filling may be softer. You might need to chill the bars longer or add extra powdered sugar to thicken.
Is this the exact Disney recipe?
It’s a Disneyland peanut butter sandwich bar copycat, meaning it replicates the taste and texture of the beloved park treat, though the exact original recipe remains a secret.
Can I make this gluten-free?
Use gluten-free graham crackers and check your chocolate chips to ensure they’re certified gluten-free.
Final Thoughts and Invite to Share or Subscribe
These Disneyland’s Peanut Butter Sandwich Bars are more than just a sweet treat—they’re a little slice of park magic you can enjoy any time, right from home. With rich peanut butter, nostalgic graham cracker crunch, and smooth chocolate on top, they deliver the perfect balance of salty-sweet goodness.
Whether you’re recreating vacation memories or just love chocolate peanut butter desserts, this no-bake recipe is a must-try. It’s easy to make, fun to share, and guaranteed to disappear fast.
If you loved this copycat recipe, be sure to share it with your dessert-loving friends, pin it to your favorites board, and subscribe to the blog for more fun, family-friendly sweets, snacks, and magic-made-at-home treats.
Print
Irresistible Disneyland’s Peanut Butter Sandwich Bars
- Total Time: 2 hours 15 minutes
Description
Craving a sweet, nostalgic bite of Disneyland magic? These Disneyland’s Peanut Butter Sandwich Bars are the dreamy treat you’ve been looking for.
Ingredients
Base and filling:
- 1 sleeve graham crackers (approx. 9 whole crackers), plus extra for layering
- 1 cup creamy peanut butter
- ½ cup unsalted butter, melted
- 1½ cups powdered sugar
- 1 teaspoon vanilla extract
- ¼ teaspoon salt
Chocolate topping:
- 1½ cups semi-sweet chocolate chips
- 2 tablespoons peanut butter (to help the chocolate set soft)
Instructions
Step 1: Prep the pan
Line an 8×8 or 9×9-inch baking pan with parchment paper, leaving some overhang for easy lifting.
Step 2: Create the bottom graham cracker layer
Lay whole graham crackers in a single layer across the bottom of the pan. Break crackers if needed to cover the full base.
Step 3: Make the peanut butter filling
In a medium bowl, mix melted butter, peanut butter, powdered sugar, vanilla, and salt until smooth. The mixture should be thick and creamy.
Step 4: Spread the filling
Pour the peanut butter mixture over the graham crackers and spread evenly with a spatula.
Step 5: Add the top layer of graham crackers
Place another layer of whole graham crackers on top of the peanut butter filling, gently pressing down to secure them.
Step 6: Melt and pour the chocolate topping
In a microwave-safe bowl, melt chocolate chips and 2 tablespoons peanut butter together in 30-second intervals, stirring until smooth. Pour over the top graham layer and spread evenly.
Step 7: Chill until set
Refrigerate for at least 1–2 hours, or until the chocolate is firm and the bars are set.
Step 8: Slice and serve
Use the parchment paper to lift the bars out of the pan. Slice into squares or rectangles with a sharp knife. Serve chilled or at room temperature.
Notes
- Sift the powdered sugar before mixing for a lump-free filling.
- Add a little salt to the filling—it elevates the sweetness and balances the chocolate.
- Chill thoroughly before slicing for cleaner edges and less mess.
- Prep Time: 15
- Category: Dessert
- Cuisine: American
Nutrition
- Serving Size: 12–16 bars
- Calories: 280
- Sugar: 17 g
- Fat: 19 g
- Carbohydrates: 23 g
- Fiber: 2g
- Protein: 5 g
Keywords: Disneyland’s Peanut Butter Sandwich Bars